This tutorial will show you how to optimize and defragment Drives in Windows 10. Optimization and Defragmentation improve the overall performance of the computer. You can defragment specific drives or all the drives as a whole. Different drives need different types and levels of optimization. Windows knows what type of optimization works for which drives and hence, Windows automatically sets the optimization procedure based on the drive you chose.
Steps to Optimize and Defragment Drives in Windows 10
Press Win+X and click on Command Prompt (Admin).
If you want to defragment or optimize a specific drive, then type the following command
defrag C: /O
(Replace C with the drive letter of your requirement in the command above)
If you want to defragment or optimize all SSDs and HDDs, then type the following command
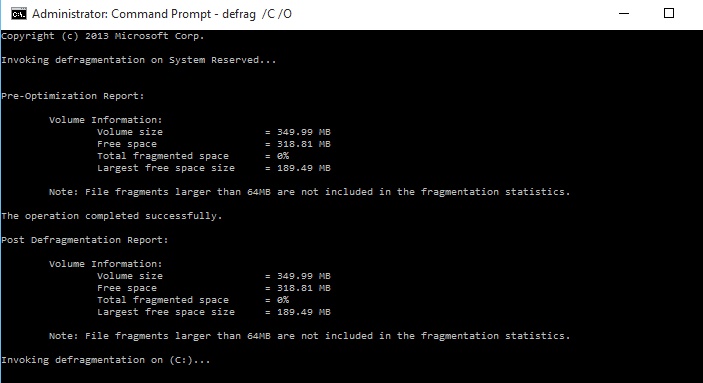
defrag /C /O

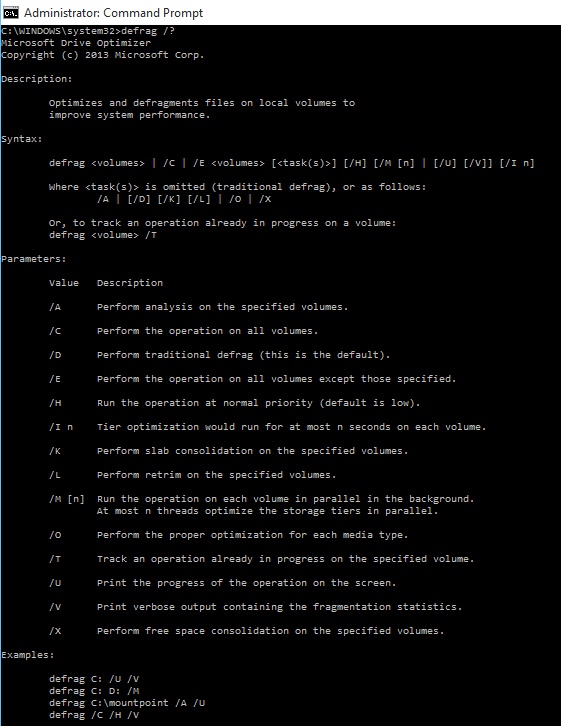
The Syntax will be something like this:
defrag
Where
Or, to track an operation already in progress on a volume: defrag
Check out the parameters:
/A – Perform analysis on the specified volumes.
/B – Perform boot optimization to defrags the boot sector of the boot volume. This will not work on a SSD.
/C – Perform the operation on all volumes.
/D – Perform traditional defrag (this is the default).
/E – Perform the operation on all volumes except those specified.
/H – Run the operation at normal priority (default is low).
/I n – Tier optimization would run for at most n seconds on each volume.
/K – Perform slab consolidation on the specified volumes.
/L – Perform retrim on the specified volumes. Only for a SSD.
/M [n] – Run the operation on each volume in parallel in the background. At most n threads optimize the storage tiers in parallel.
/O – Perform the proper optimization for each media type.
/T – Track an operation already in progress on the specified volume.
/U – Print the progress of the operation on the screen.
/V – Print verbose output containing the fragmentation statistics.
/X – Perform free space consolidation on the specified volumes.


