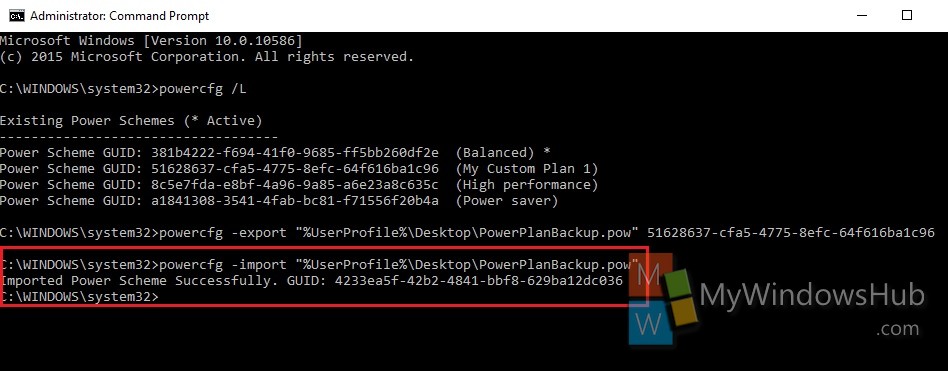
Power Plan is a collection of all hardware and system settings that manages the power utilization in your computer. Windows operating system allows you to create your own custom power plan and personalize it according to your choice. Creating a new plan is important because you can set your own power preferences and at the same time does not alter the default settings like Balanced, High Performance power plans. You can export and import a power plan and all its associated settings in .pow file on the desktop. The following tutorial will help you to import and export power plan in Windows 10.
Steps to Export and Import a Power Plan in Windows 10
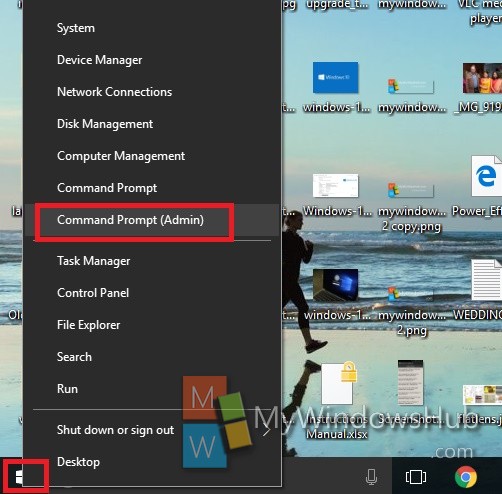
1. Press Win+X and select Command Prompt (Admin) to open the elevated Command Prompt.
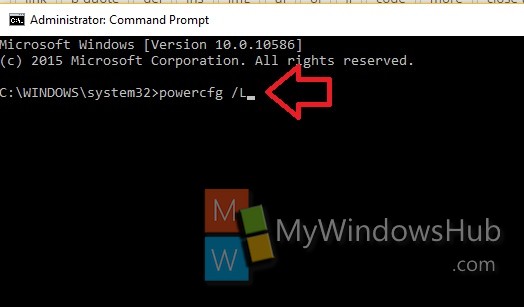
2. Now you need to display all the power plans that are running on your computer. Copy and paste the following command and then hit Enter.
powercfg /L
3. If you want to export a power plan, note the GUID of the power plan that you want to export.
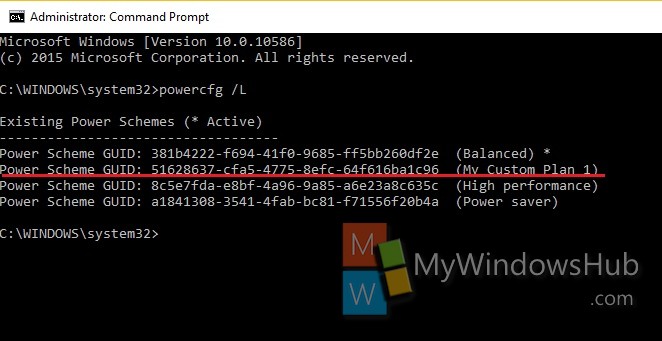
4. Now copy and paste the following command and replace the term GUID by the actual GUID of the required power plan. Check out the red underlined part in the screenshot for reference.
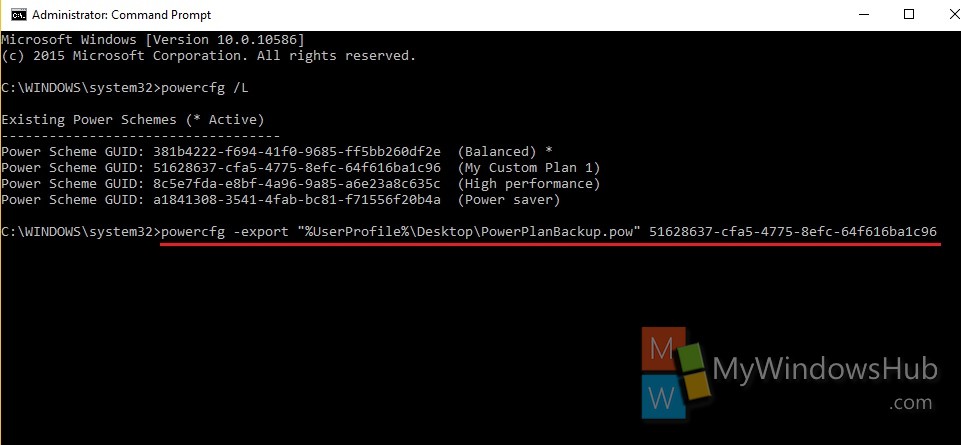
5. Now a PowerPlanBackup.pow file will be saved to your desktop as the backup of the power plan. You can rename it and then save it for future requirement.
6. Now if you want to import a powerplan, open Elevated Command prompt as shown in step 1.
7. Copy and paste the following command and hit Enter to export the power plan
powercfg -import “Full path of .pow file”
Replace the terms inside inverted comma by the actual path of the Backup Power Plan. Check screenshot for reference. When it’s done, you will get the message, Imported Power Scheme Successfully.
