In our last advanced Windows 10 tutorial on Macrium Reflect free edition, we have discussed the steps on how to take the system back up in image format and recover those in case of system failure. In this tutorial, we will demonstrate a unique Macrium product named viBoot capable of creating Hyper-v virtual machines from the Macrium, backed up system images. It is easier to replicate your exact system snapshot to a system image, and that can be later very beneficial. It even allows you to install software, update, and upgrade systems pretty quickly.
A practical scenario:
What if you would like to install a piece of software to a virtual machine whose image was created earlier, without Macrium viBoot it’s like building a brand new system image with the recent software installations. But with Macrium viBoot, you can apply the latest softwares and changes to the existing virtual machine with the utmost ease.
How To Create Virtual Machine On Windows 10 Using Macrium Image
Features of viBoot:
- Macrium viBoot allows you to create instantly, start, and manage Microsoft Hyper-V virtual machines using one or more Macrium Reflect image files as the basis of the virtual machine storage sub-system.
- Macrium viBoot is now built upon a new technology that immediately presents a Macrium Reflect image file as a Microsoft Virtual Disk (.VHDX) file.
- viBoot enables you to boot into the images you have made using Macrium Reflect, validation purposes, or recovering data from old applications saved on a bootable image. At an enterprise-level, you could recover an entire network environment in minutes.
System Requirements To Create Virtual Machine On Windows 10
- Windows 10 and above / Windows Server 2012 R2 and above. Microsoft Hyper-V
How to get Macrium viBoot on Windows 10?
Macrium viBoot comes integrated with all editions of Macrium Reflect. With installing Macrium Reflect home/free edition, you can start using viBoot directly from the Reflect’s homescreen. Let us go through the steps to use viBoot in your Windows 10 system,
Steps 1:
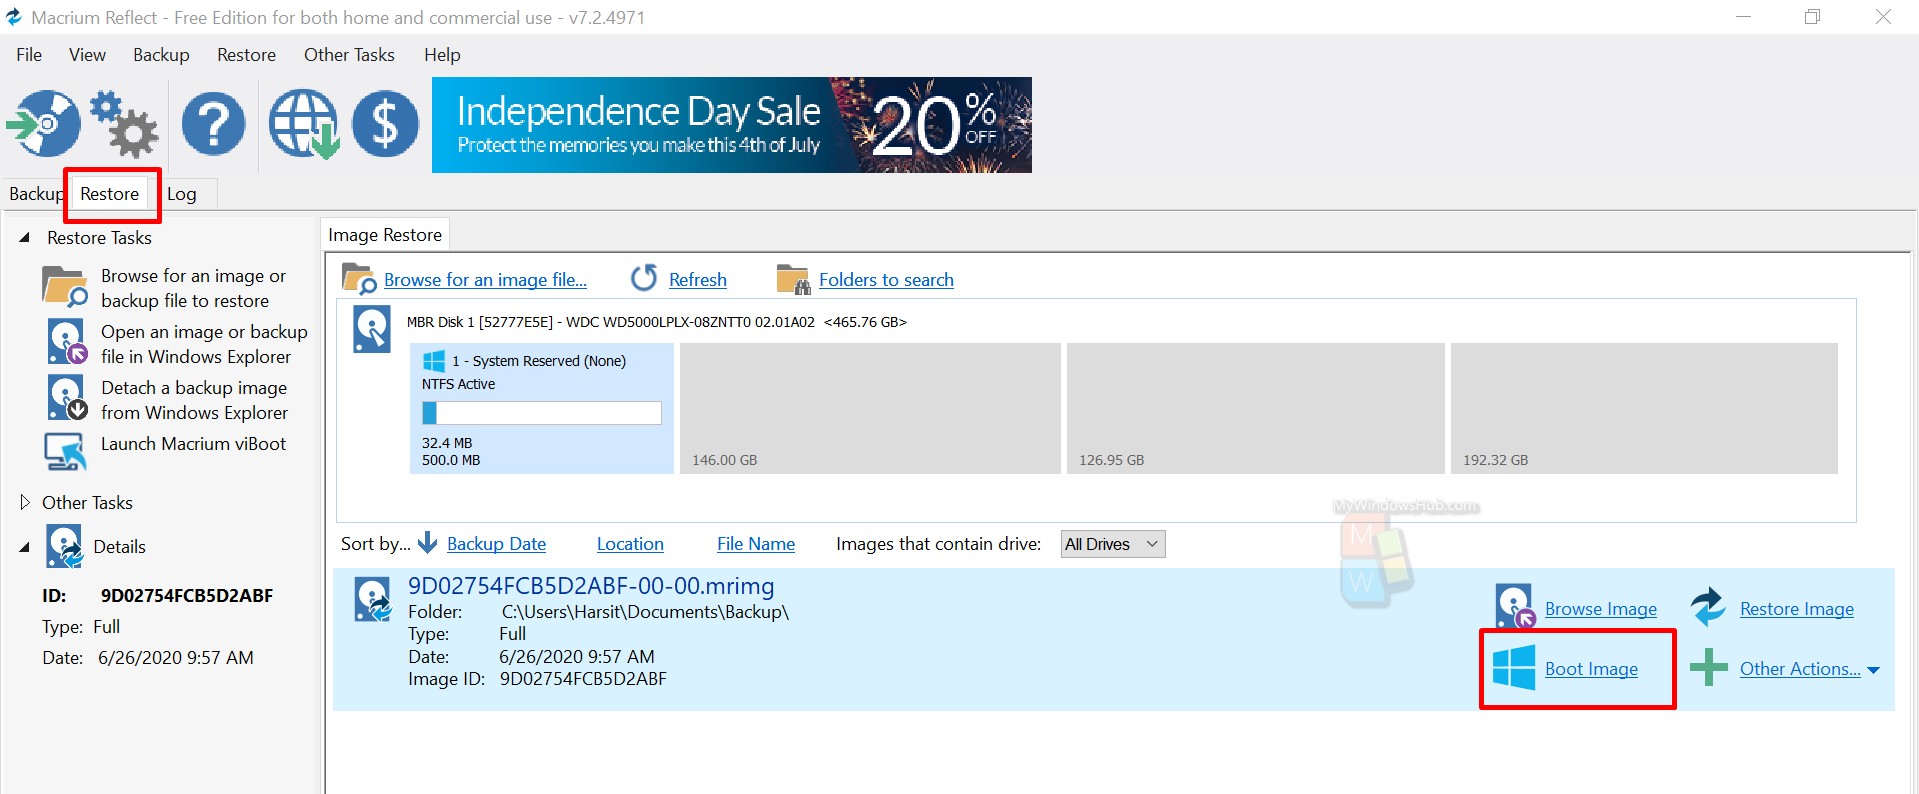
- Open Macrium Reflect on your system and select Restore option at the left corner.
- You shall be able to see a list of all previous backups done by Macrium reflect.
- Then choose a target Macrium image and then click on the Boot Image option to begin the process.
Note:
- Make sure you have taken a proper back up of your whole system containing all the required Windows dependencies to get a proper Hyper-v clone of your system.
- Choosing a Macrium image not having windows dependencies won’t boot up properly inside the vm.
Step 2:
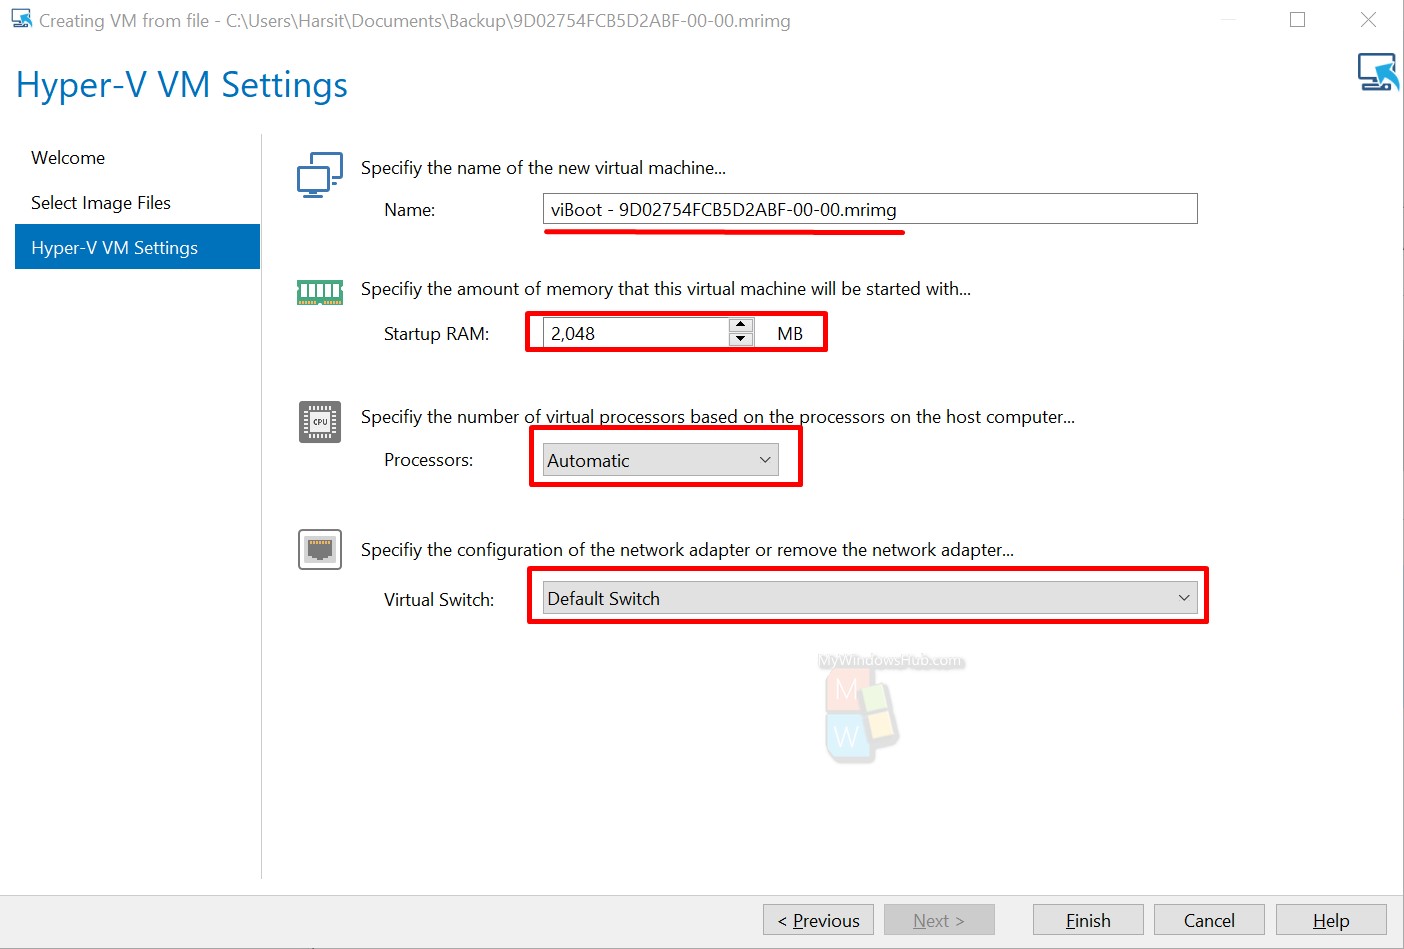
In this step, you need to configure free things such as the physical memory, processor allocation, and mode of networking for the virtual machine.
- You change the name of the virtual machine by modifying the first textbox.
- It is recommended to allocate at least 4 GB of RAM to a Windows 10 based VM to function smoothly.
- Make sure to leave the processor allocation to Automatic for better and auto availability of processor for the vm.
- If you don’t want any networking activities inside the vm, you can leave the last drop-down unselected. In our case, we have selected the default switch.
- It will take a while to set up the virtual machine, and based on the backup image size, this can take up to 30 minutes.
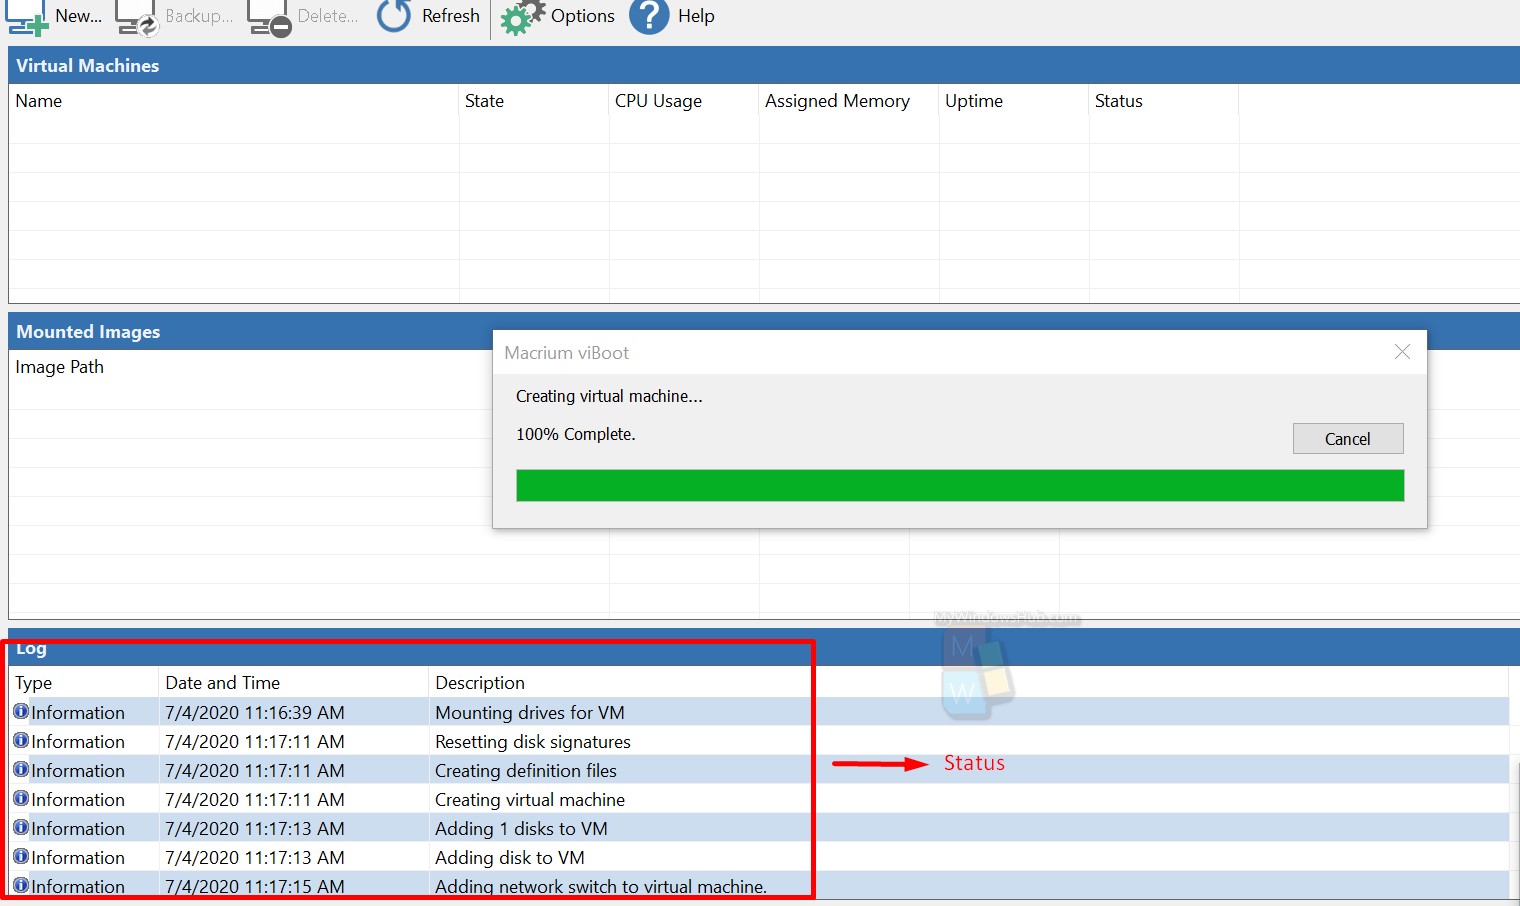
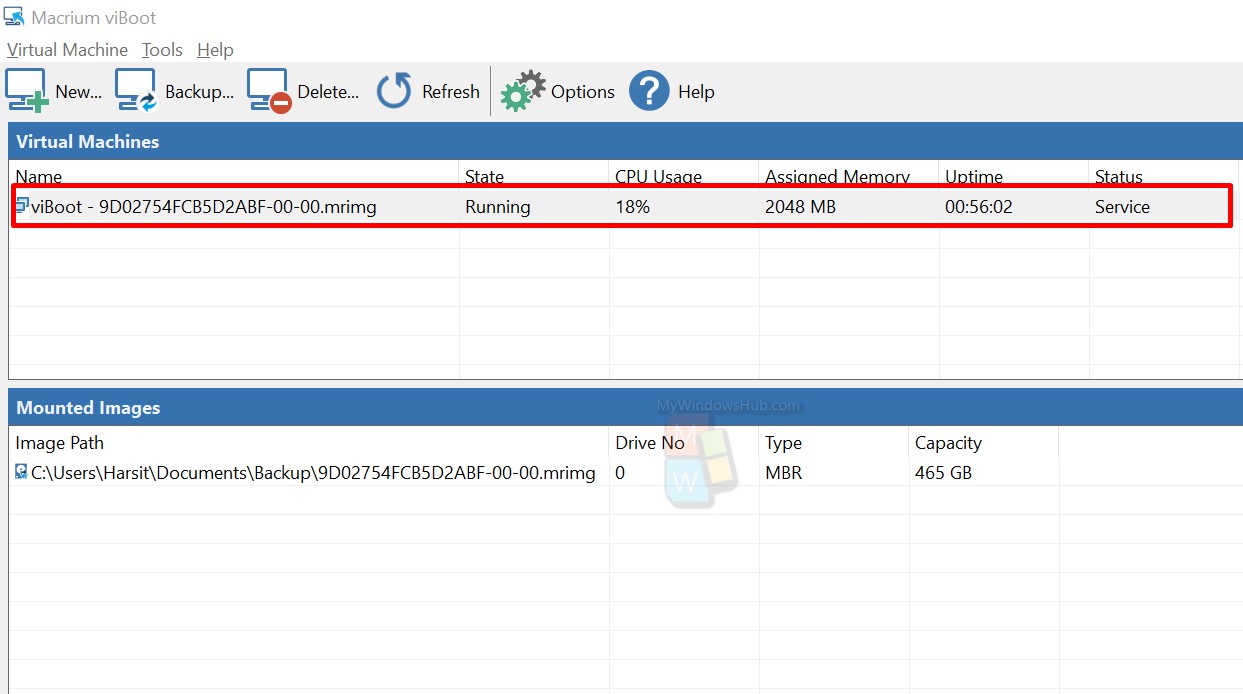
- You can monitor the status of the virtual machine at both Macrium viBoot panel and Hyper-V manager.
Step 3:
Now your virtual machine is up and running smoothly. What if you need to upgrade or install software that you recently installed in your host machine, but not available in your virtual machine. Well, Macrium viBoot makes it super easy to perform it.
- viBoot vm allows you to update the Windows in the image regularly.
- You can add personal files to the image by simply copying those to the virtual machine.
- You can download or copy the softwares directly into the vm.
Apply changes to the system image:
To apply the changes you made in step 3, you need first shut down the virtual machine by following steps,
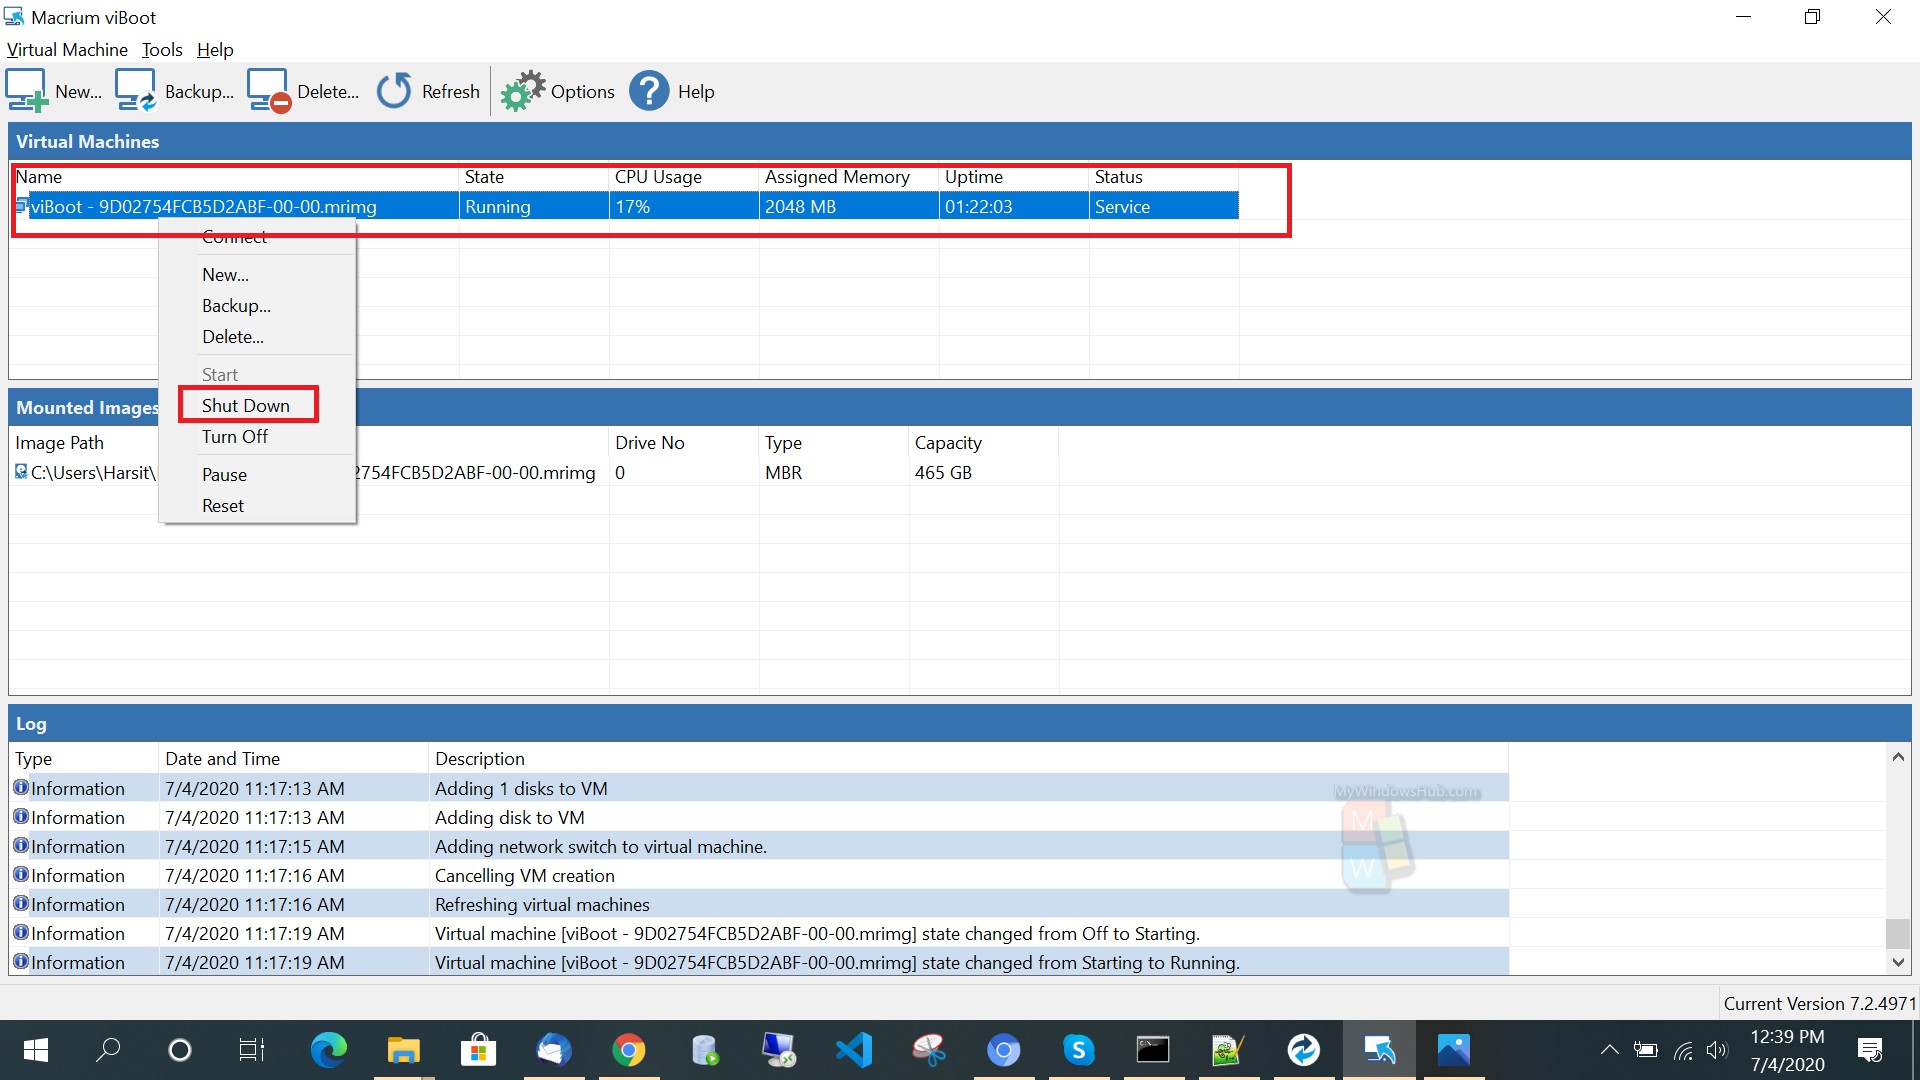
- Shutdown the virtual machine.
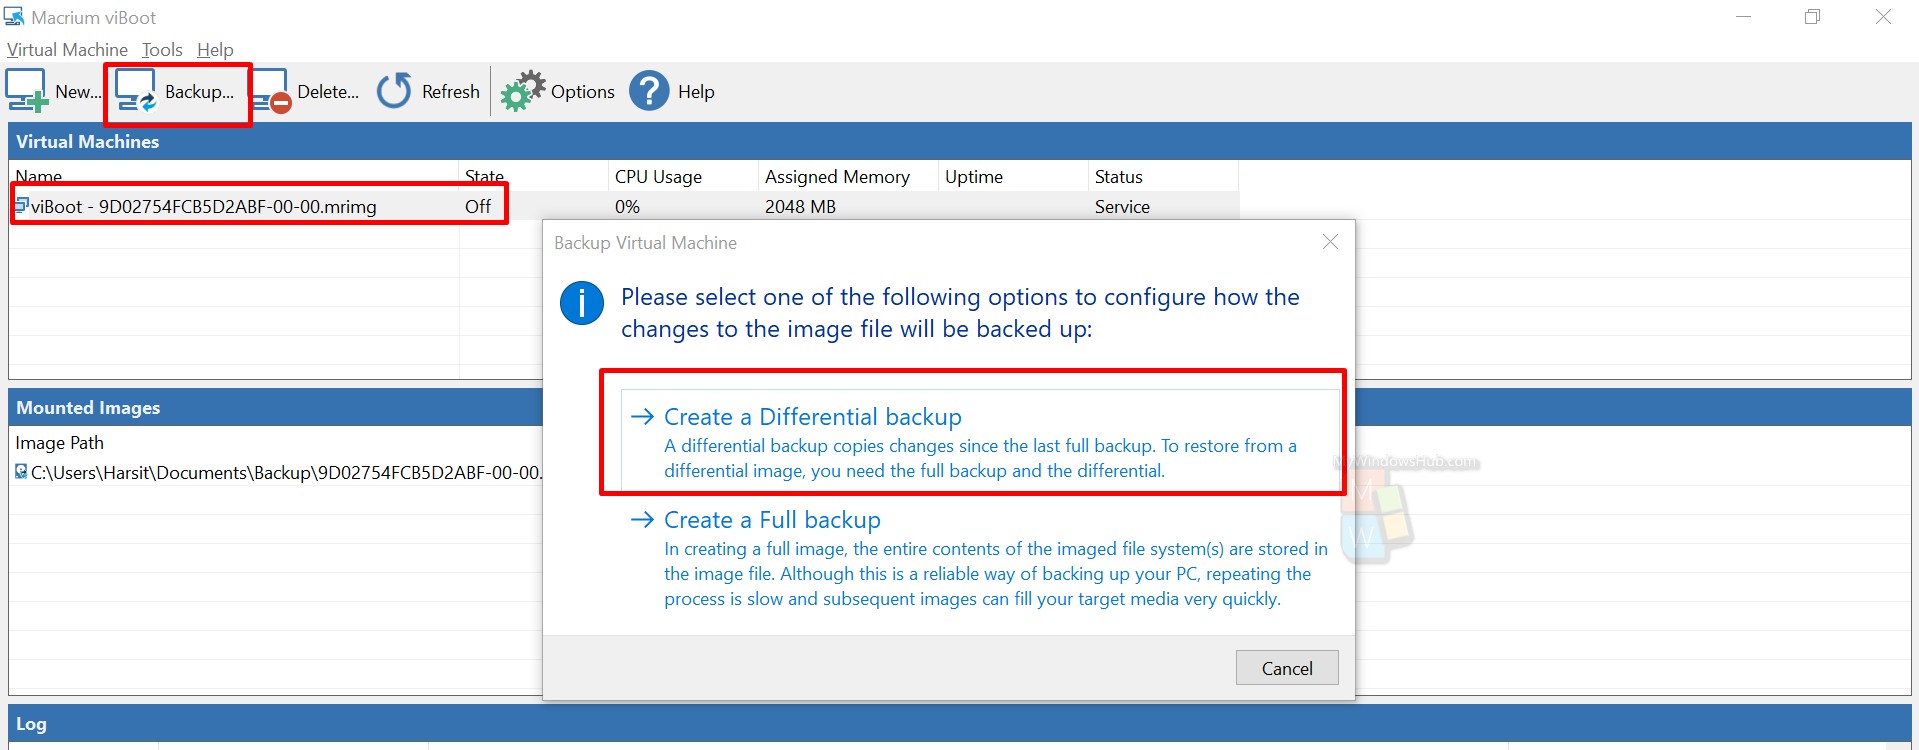
- Select the virtual machine and then click on Backup.. option to begin the rebuild phase.
- Select the “Create a Differential backup” option to copy the changes since the last full backup to the system image.
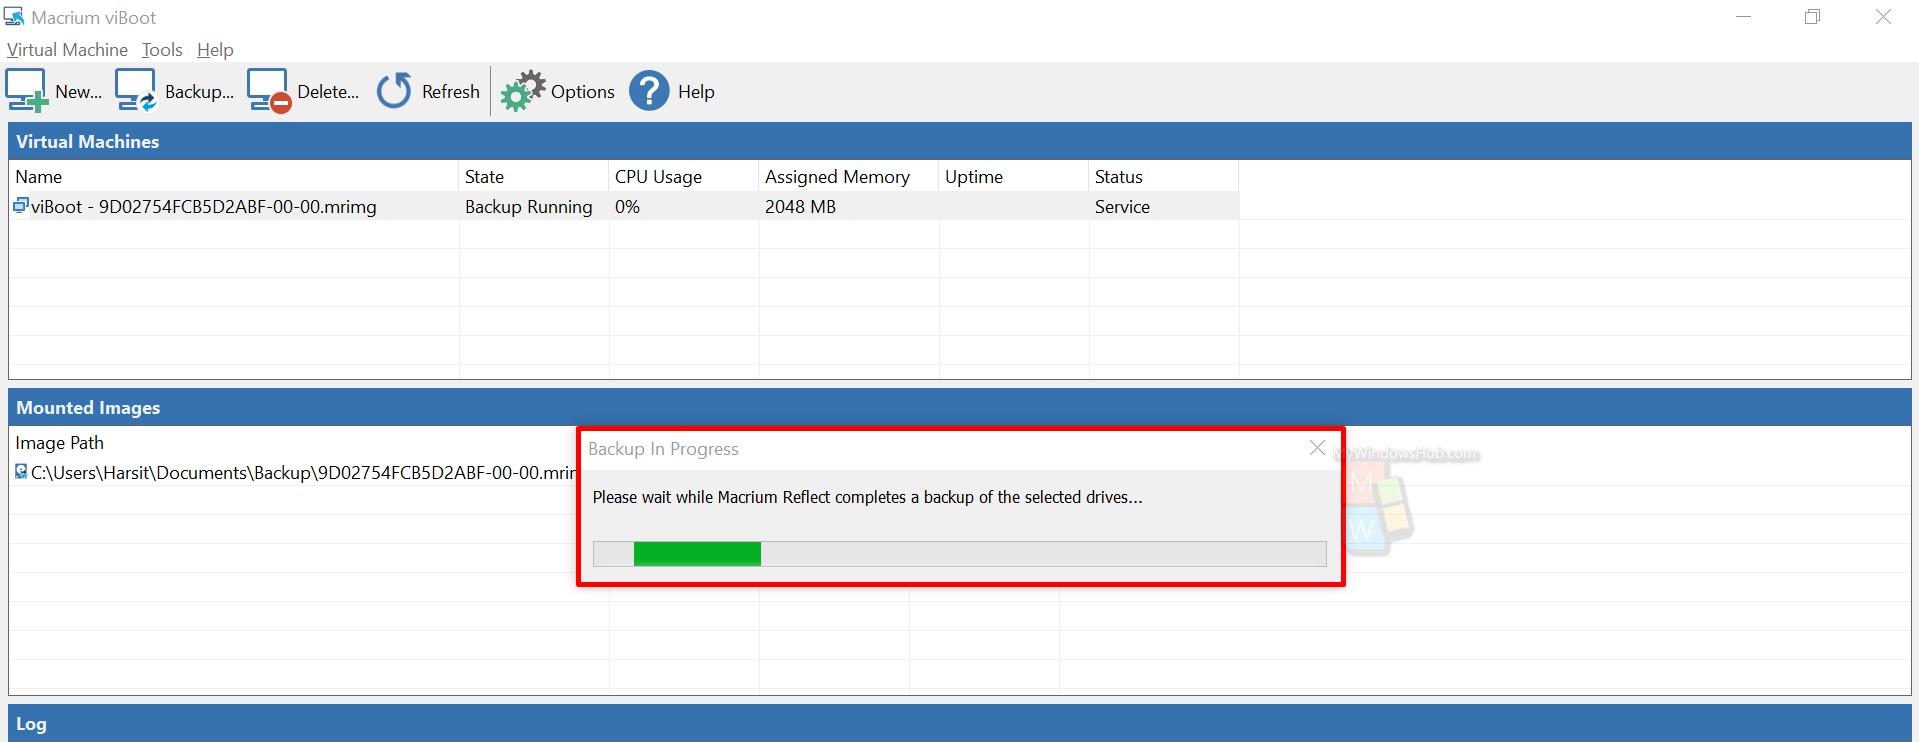
- You can check the updated differential backup image file in the same folder where the original image is stored. You can delete the original backup to increase the disk space.

Conclusion
You are all set with the updated Macrium image. You can restore Windows to any machine with all the additional softwares and files. In this advanced Windows 10 tutorial, we have walked you through steps to create virtual machines using Macrium viBoot, and eventually, we illustrated the steps to create a differential image.

