Microsoft Word is one of the most popular document editor application for Windows as well as macOS. It is full of features and whether you are writing an essay, a book or a journal, MS Word is complete and self sufficient. Many a times, students cannot find out the right guidance to use this software because it is massive and finding out a single layout or design is a tough job.
In this article, we shall show you how to create a border to a page in MS Word Document. Word documents with a border around them, adds attraction to the overall look of the document. You can add border to pages, tables, charts, graphics, images, etc. Creating borders is extremely simple and does not need anything to worry.
Steps To Create A Border To A Page In MS Word Document
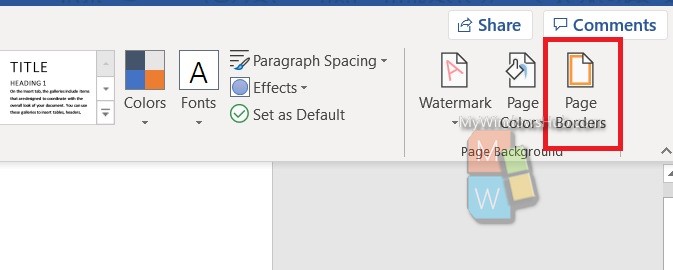
First open the word document. Click on the Design tab at the top. In the extreme right side of the Design tab, you will find the page border option. Click On it.

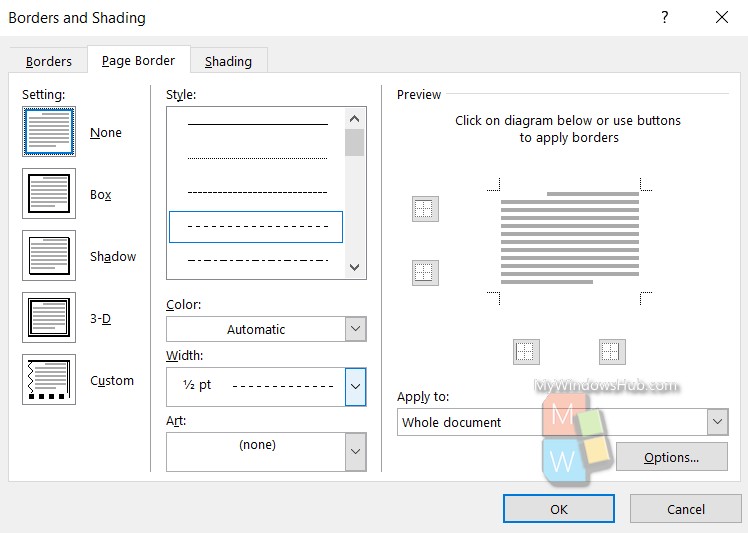
As you click on the Page Border option, the Borders and Shading option opens. There are a plethora of settings available for you to customize. You will get Borders, Page and Shading. Users can add different types of borders such as 3D borders, colored, shadow, box, etc. The same different options are available for shadowing and borders as well.

That’s all!

