Windows 11 keeps updating itself periodically with the new fixes, updates, drivers and hotfixes, released by Microsoft. If you work regularly on your PC, then installing updates during your work hours interrupts your work. So, it is a great idea to let your Windows 11 PC know which time you are active on your PC. Windows is smart enough to schedule updates of OS and drivers at a time when you are not using the PC.
This is called Active hours and it lets Windows know, that you are actively working on the PC.
Microsoft has set the default active hours 8 AM to 5 PM. This means the Start time for Active hour is 8 AM (for a 12 hour clock format) or 8 hours (on 24 hours clock format). The End Time is 5 PM (on a 12 hours clock format) or 17 hours (on a 24 hours clock format). You can change it to any other time span based on your convenience.
This tutorial will show you how to set active hours for your PC, so that it does not automatically restart your Windows 11 PC during this span, for installing a Windows Update.
Steps To Set Active Hours for Windows Update in Windows 11
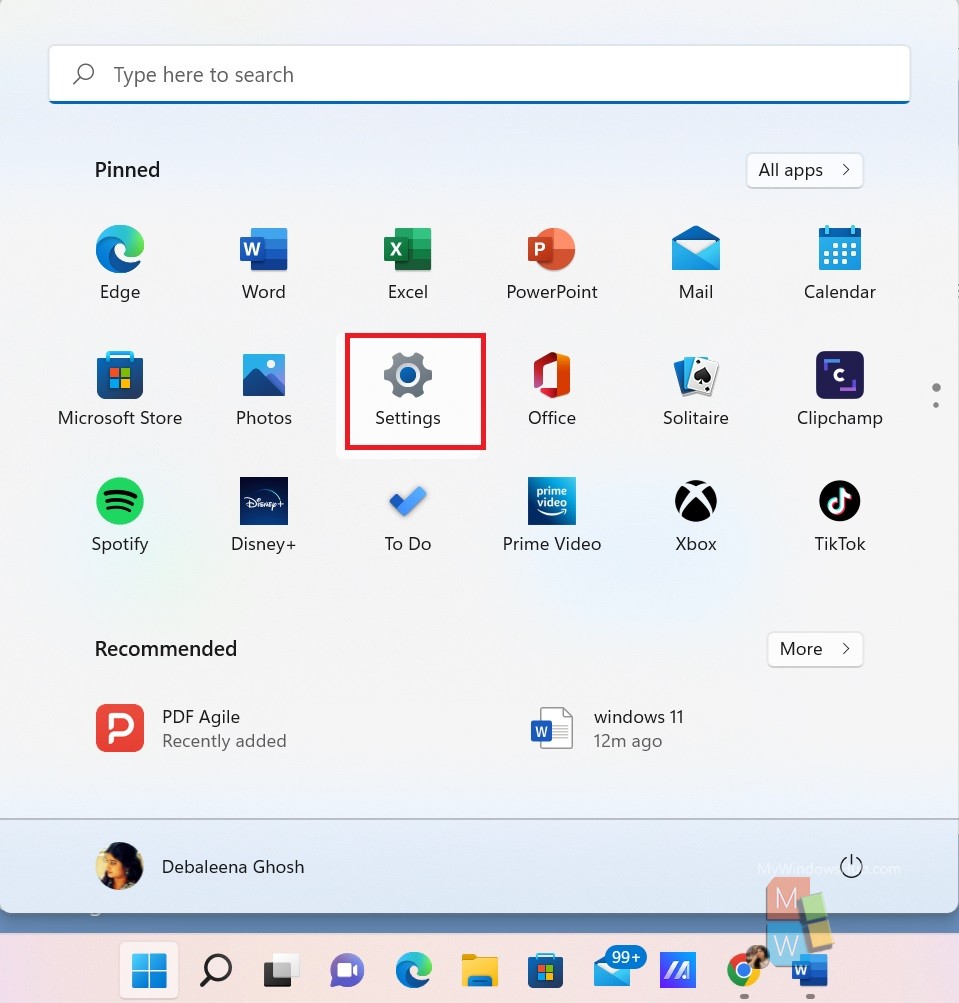
- First, open Windows menu (tap on Windows key on your keyboard), and then go to Settings.

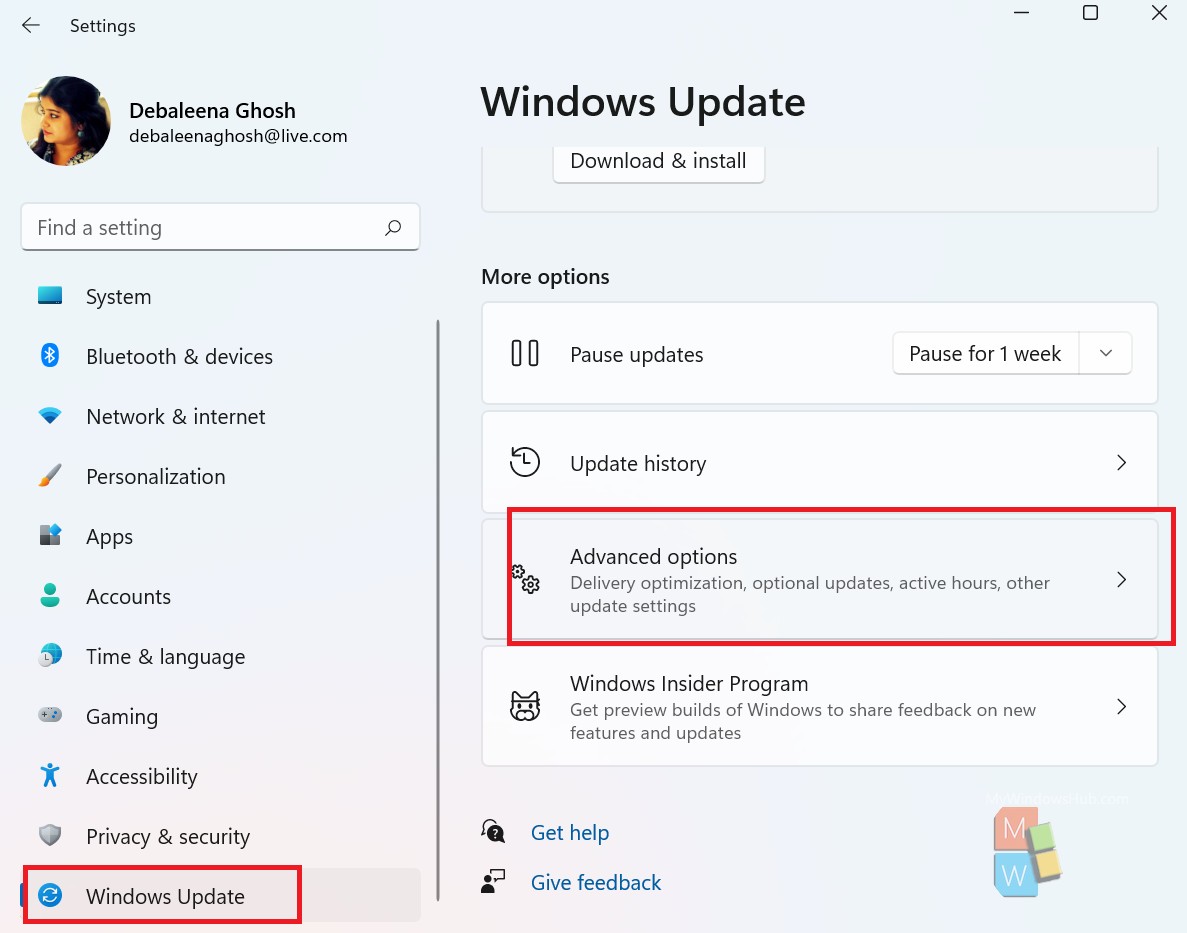
2. As Windows Settings open, in the left panel, click on Windows Update. In the right pane, click on Advanced options.

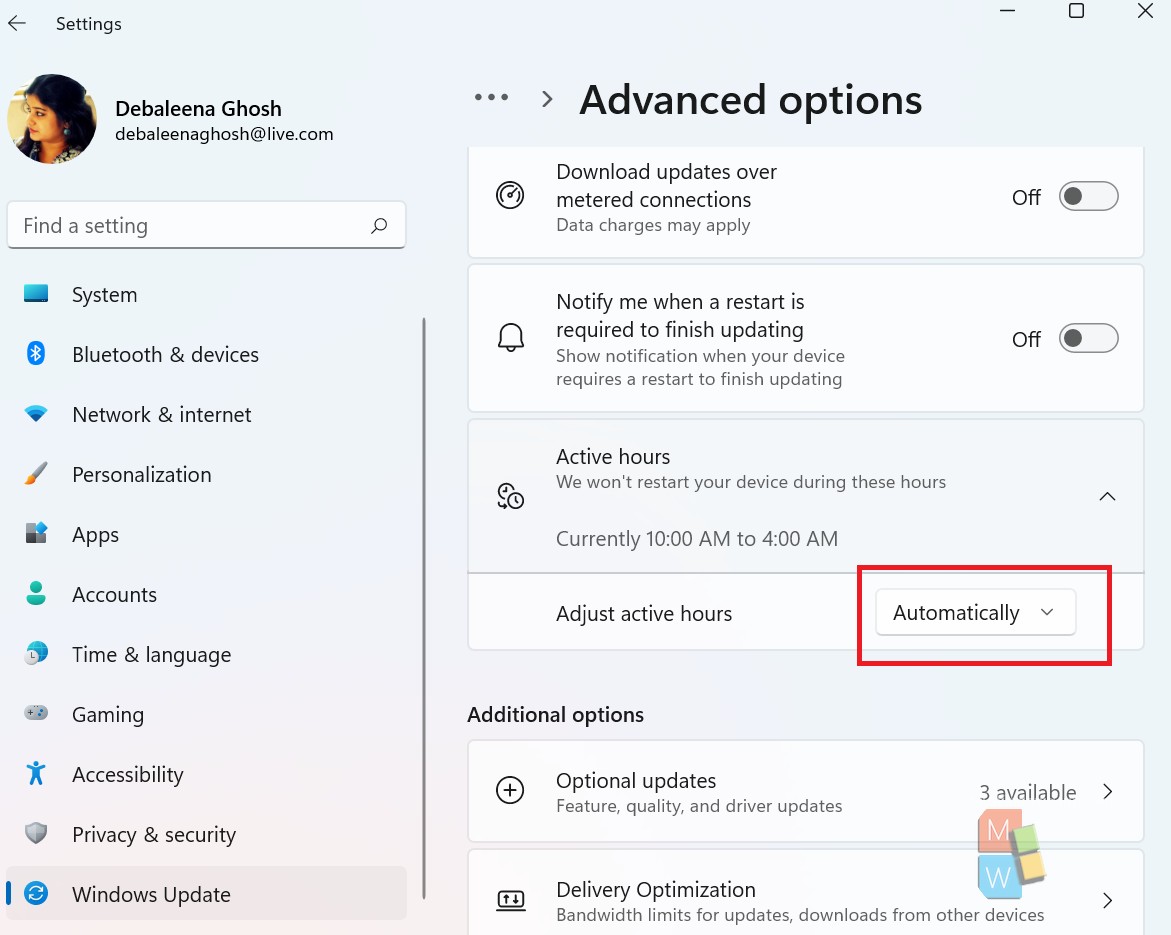
3. Scroll down and find Active Hours. You will see the active hours, that is set on your PC. Also, you can see another option Adjust Active hours. Click on the drop down box.

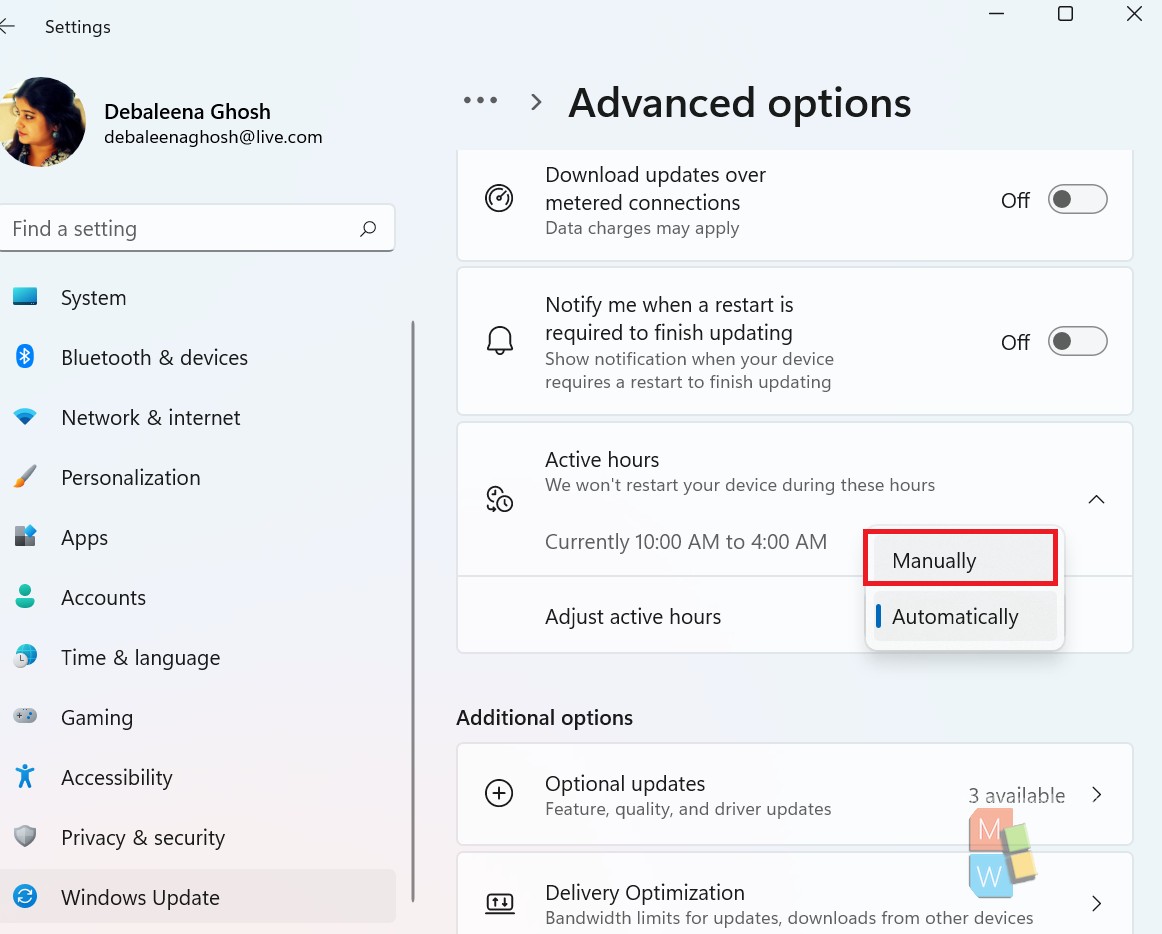
4. Choose manually, if you want to change the start time and end time

5. you can now set the start time and end time according to your own choice. Close settings when done. That’s all!

