You must have heard the typical pop up sound whenever the PC fails to connect to another device, in a Windows 10 computer. Windows 10 allows you to change several notification sounds from the Sound application. If you confuse among different notification sounds, then you can set different tones for different types of notifications. If you want to change the device failed to connect notification sound, then follow the article below.
Steps To Change Device Failed To Connect Notification Sound In Windows 10
1. First open Sound option from Control Panel. There are several ways of doing opening the Sound app. You can open the Control Panel (Right click on Windows Button, go to Control Panel), go to Hardware and Sound. Then click on Sound.
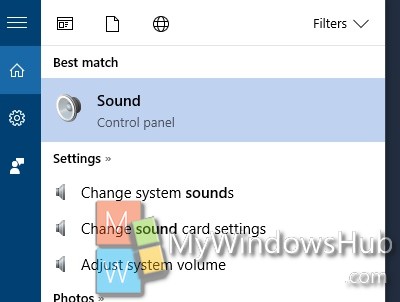
But since you are using Windows 10, why waste so much time? Simply open Cortana, type Sound. The Sound app appears in the search result. Select it.

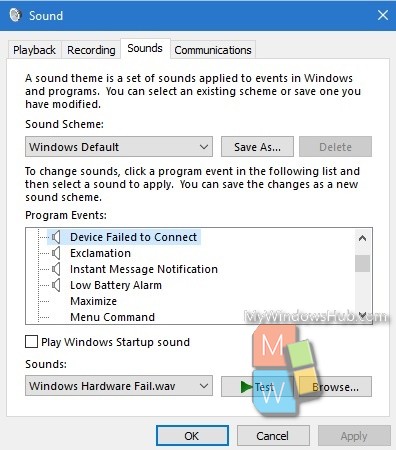
2. As Sound app opens, click on the Sound tab. Now under program Events, scroll down and find out Device Failed To Connect. Now, if you click on Test, you will hear the default Windows Blocked Pop-up window Notification sound. If you want to check if the sound is configured for the event, then click on Test.
3. Now if you want to change the sound of Device Failed To Connect notifications, then click on Sounds: just below the Program events. If you want, you can also add custom sound clips. If you want to use a custom sound, download it and make sure it’s in WAV format. Next, click the Browse button on the Sounds tab, and select the audio file you downloaded.

That’s all!

