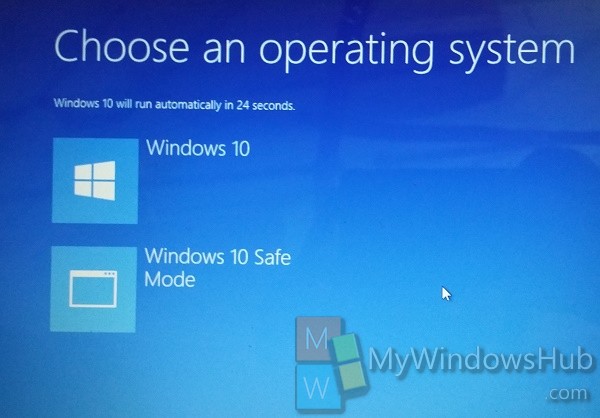
Windows 10 OS has a definite name that can be found with a help of a small Command prompt Command. Windows 10 comes in different versions, like Home, Pro etc. If you have many PCs running different versions of Windows 10, you can change the name at Startup from Windows 10 to Windows 10 Pro or Windows 10 Home or to anything you desire. The following tutorial will help you to change operating system name at startup.

Steps to Change Operating System Name at Startup in Windows 10
1. Right click on the Start Menu, go to Command Prompt (Admin) and hit Enter to open the Elevated Command Prompt.
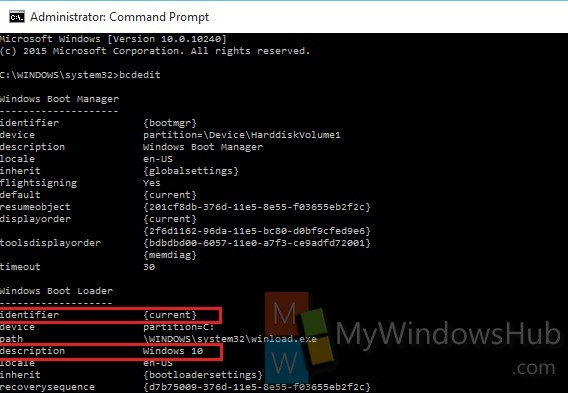
2. Now type bcdedit and tap Enter. A long description about OS will appear.

Check every Windows Boot Loader description. The Identifier denotes the mode of Operating system and Description denotes the name.
3. Now type the command with some adjustments.
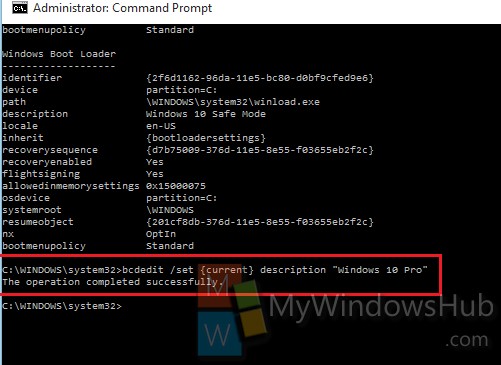
bcdedit /set {identifier} description “new name”
Replace identifier by the actual identifier name and new name by the name you want to keep. Now press Enter. For e.g. bcdedit /set {current} description “Windows 10 Pro”

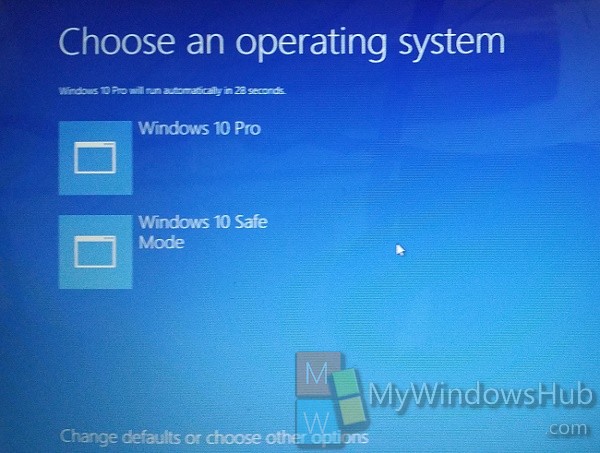
4. It’s done. Reboot the computer to see the changed effect.


Simplified Worth Information
Thank You !