

DHCP is the acronym of Dynamic Host Configuration Protocol. DHCP is nothing but a network management protocol used on TCP/IP networks whereby a DHCP server dynamically assigns an IP address and other network configuration parameters to each device on a network so they can communicate with other IP networks. A DHCP server enables computers to request IP addresses and networking parameters automatically from the Internet service provider (ISP), reducing the need for a network administrator or a user to manually assign IP addresses to all network devices In the absence of a DHCP server, a computer or other device on the network needs to be manually assigned an IP address.
Your computer must need to have an IP or Internet Protocol address to connect to the Internet cloud. There are two types of IP addresses, Static IP and Dynamic IP. In case of static IP the IP address of your computer is always fixed and it does not change during different internet seasons. But if your Internet service provider supports dynamic IP assignment with DHCP, you can take the advantage of dynamic IP addressing in your Windows 10 PC. In that case, using Dynamic Host Control Protocol your Windows 10 device will automatically get a dynamic IP address from DHCP server.
The following article will help you to turn on DHCP in case it is not turned on.
Steps to turn on DHCP in Windows 10
DHCP Server keeps record of available IP addresses and assigns an IP address from the available pool of IPs to the devices from which it gets DHCP Request. There is a lease time (by default it is 24 hours) of every IP assignment. After that lease time the device (computer) needs to send another request to the DHCP server to renew the lease session. DHCP server then assigns another IP address to the device. So, if DHCP is enabled, your computer will get different IPs in different Internet Seasons.
Steps to turn on DHCP in windows 10
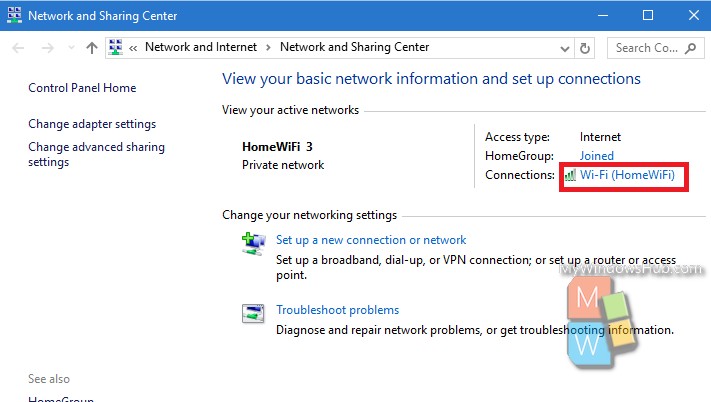
1. First, right-click on Network icon, i.e the Wi-Fi sign and choose Open Network and Sharing Center.

2. Now, select the network with which you are currently connected. Click on the “Connections” menu and select your own Wi-Fi/connections.
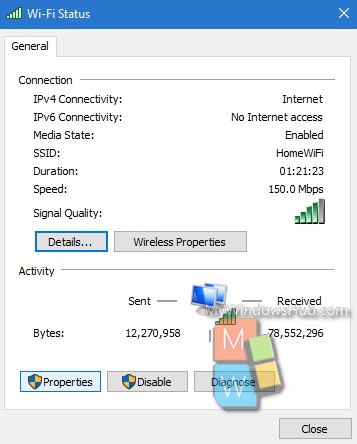
3. Now, a connection status window will pop up. Click on Properties.
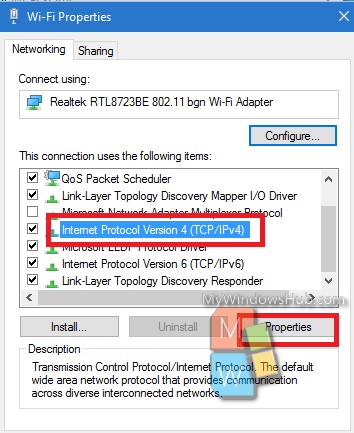
3. In Connection Properties window, check Internet Protocol Version 4 (TCP/IPv4) option and select Properties.
4. Now, set the radio button to Obtain an IP address automatically and Obtain DNS server address automatically options and press OK.
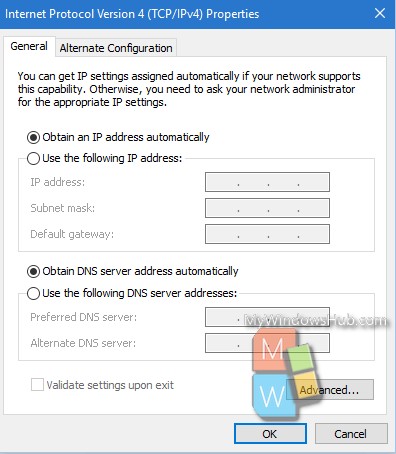
You are done. DHCP is successfully activated in your Windows 8. If your service provider supports DHCP you can now enjoy dynamic IP addressing.