

Video becomes more and more popular today and we can watch movie, TV shows, live stream and short video on YouTube, Vimeo, Facebook, Instagram, Tik Tok…but those videos have been edited with some software. Actually, everyone can make the videos and post on those platforms. It is easy to create your video style with PawEditor, a powerful video editing utility.

Basic and Advanced features to Enhance Your Video
Basic edits:
- Trim: cut the recorded or downloaded video into multiple clips.
- Rotate: set up the degree of rotation and preview.
- Merge: merge different clips into a new video or add the audios and images to the video.
- Position & size setting: adjust the place of the scene and the resolution.
- Speed: speed up or slow down the video fragment.
- Audio setting: adjust the volume or separate the audio from the video.
- Output setting: frame rate, bit-rate, format, path can be selected for the suitable one.
Advanced operation:
- Keyframes: From Wikipedia, we will know a keyframe in animation is a drawing that defines the starting and ending points of any smooth transition. Thus, with PawEditor, you can add the keyframe and customize its parameter to make your movie smooth, vivid.
- Effect: Up to 25 templates of effect for you to add to the timeline. Blur, Wiggly, Reduce noise, Mirror, Wave and more will let your movie become special.
- Transition: The changing pattern between two scenes can enable the video to playback smoothly and you won’t feel it abrupt to transit between two slides. For example, Top to bottom, Left to right, Round Zoom in, Vertical Erase and so on.
- Color/filter: Changing the color of the video will turn the original tone into another style. Saturation, Warm/Cool color, Chromakey, Invert color, etc. are provided for rendering the video to create your own story.
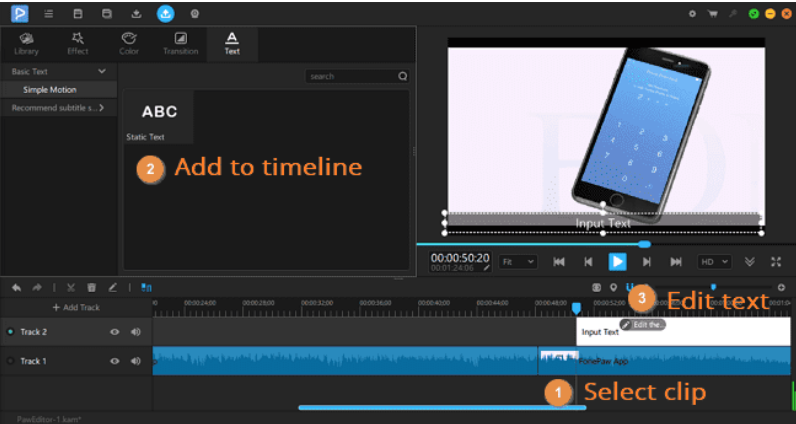
- Text: It is simple to add title to the movie. Set up the font, size, position, style of the text before or after inputting the words.
Minute Guide to Create Your Own Movie
Step 1. Add the sources to library and timeline
Download PawEditor here: https://www.fonepaw.com/downloads/paweditor.exe
After installing, create a project with name and double click to select the video, audio and images to library in PawEditor. Then add them to the timeline. Adjust the positions of those files. If you want to set the music as the background of the whole video, put it in the different track from the video track. In addition, you can mute or separate the audio from the video.
Step 2. Edit the sources
Make your edits as what you think. Both basic edits and advanced edits can be done easily. The features are on the top side and you are able to select the ideal ones. Or right click the clip and hit “Edit”, “Position, scale, rotate” or others to customize.

Step 3. Preview your movie and export
When you are satisfied with your editing, preview it on the right side and export it as .mp4, .mov, .avi, .gif, .wav, .flv, .mp3. If there is less than 1GB on the saving disk, you need modify the path or clean up that disk.
Step 4. Share to the world
If the video is made for a film, a tutorial video, a presentation, share with your friends or upload to YouTube, Vimeo, Instagram. Now, you have become a successful movie editor.
PawEditor is easy to use and offers a user-friendly interface with useful features. Personally, I like it due to its keyframe features and many video editors do not have this feature to customize the animation. No special skills and experience required! It offers trial version so you can try it on your Windows computer now (Mac version is coming soon).
About Nick
Nick is a Software Engineer. He has interest in gadgets and technical stuffs. If you are facing any problem with your Windows, feel free to ask him.