

Windows Defender Firewall is the security guard of your Windows computer. Windows Firewall is a vital application developed by Microsoft and comes with every Windows PC by default. It is the default antivirus protection of your Windows computer. Windows Firewall facilitates filtering of data transmissions across the computer. When you scan your computer using Windows Defender or Windows Firewall, whatever you call it, it scans each and every file and folder. Sometimes, there are certain files or file types, that we know, are not corrupted and we want to skip them to speed up the scanning process. In that case, you can exclude those folder or file or file types to be scanned by Windows Defender. In this article, we shall show you how to exclude a folder or file from Windows Defender scan on Windows 10.
Steps To Exclude A Folder From Windows Defender Scan in Windows 10
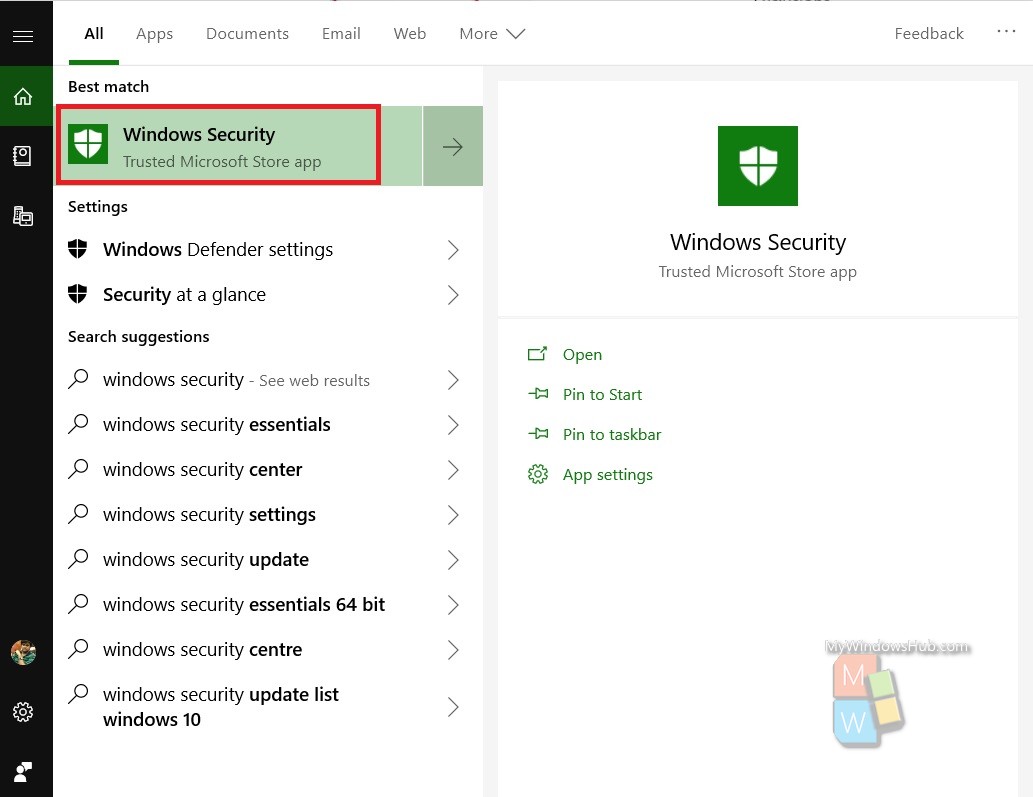
Open Cortana and in the Cortana search box, type Windows Security. From the search results, select Windows Security.
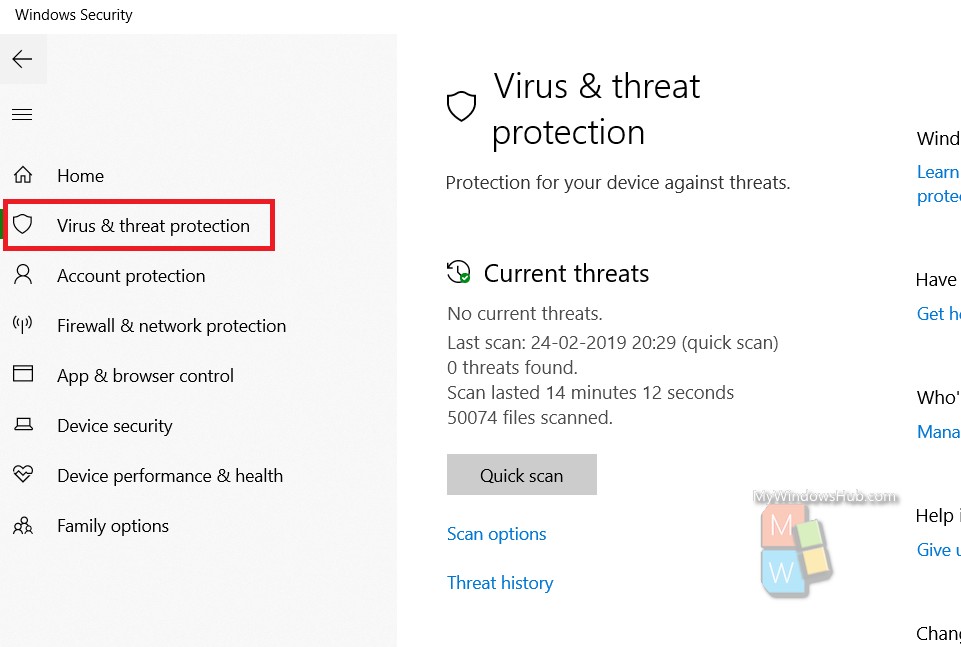
As Windows Security opens, click on Virus and Threat Protection.
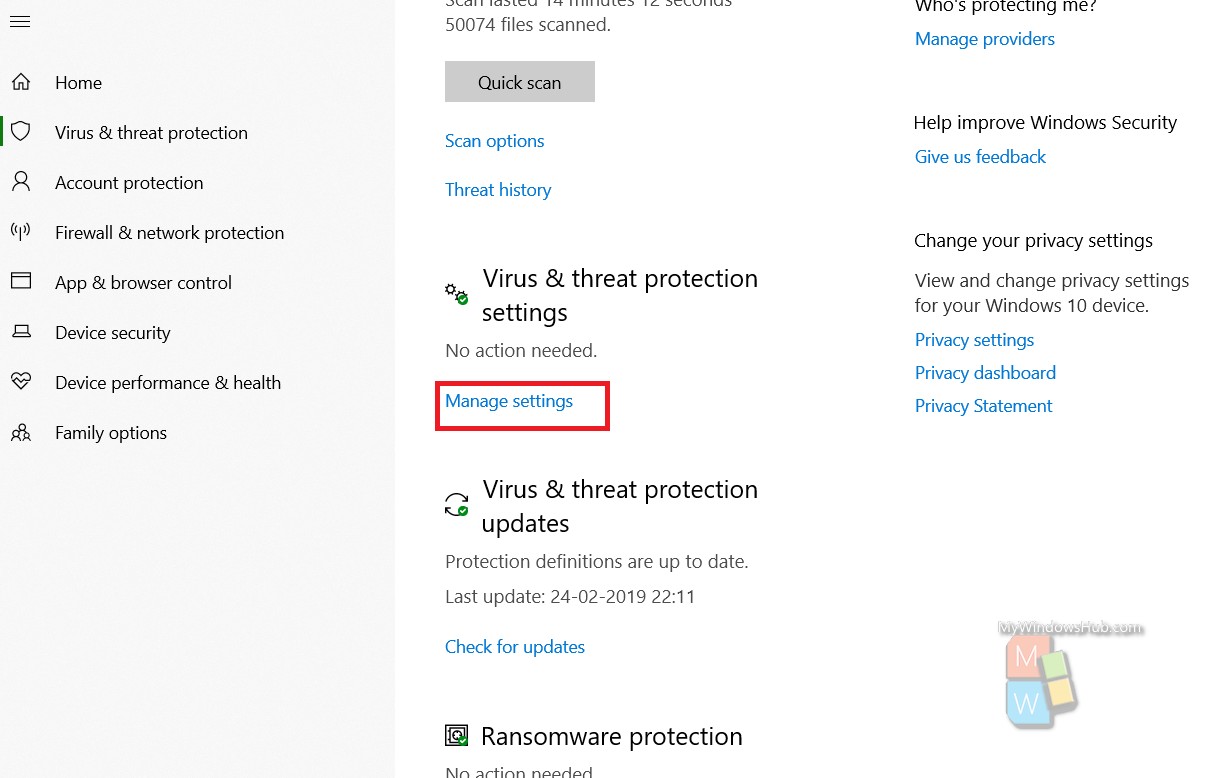
In the right panel, scroll down and find Virus and Threat Protection Settings. Under this, click on Manage Settings.
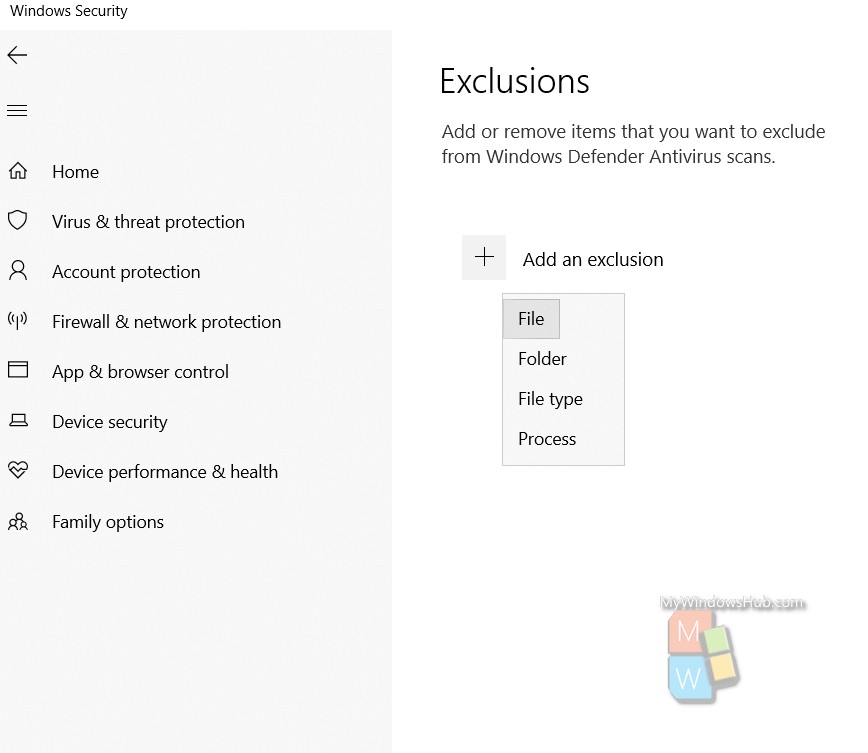
In the right panel, there is an option Exclusions. Under it, there is another option called “Add or Remove Exclusions”. Next, click on Add an Exclusion.
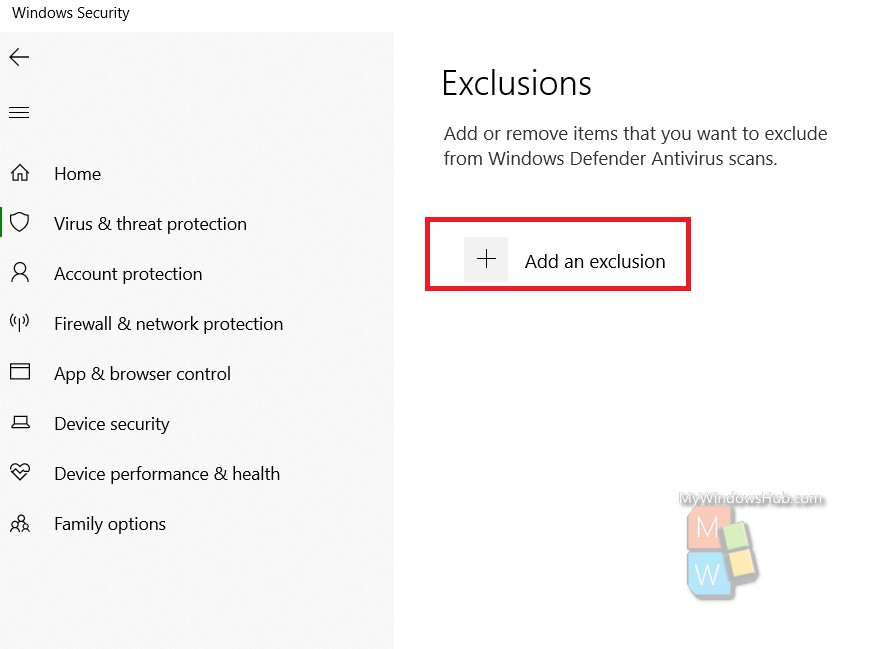
Click on it and choose file, folders, file type, process. Choose the one you need.
That’s all! In this same way, you can remove the exclusion.