

Battery consumption is a big issue for any electronic device. If you are running your Windows 10 laptop on battery, then a lot of updates are paused in order to retain the battery power for longer period of time. But there are certain updates, which are extremely crucial for the health of your computer. But, if there are situations where you need to preserve battery more than anything else, then you can try to disable security intelligence updates on Windows 10. There is a policy setting to perform that.
This policy setting allows you to configure security intelligence when the computer is running on battery power. If you enable this setting, security intelligence updates will occur even running on battery power. If you disable this setting, security intelligence updates will turn off while the computer runs on battery power. You can block or allow such updates on your windows machine while consuming battery power using the Local Group Policy Editor and Registry Editor. By default, Microsoft Defender Antivirus (Windows Defender) will automatically update the security database irrespective of your device’s power. This article will help you enable or disable Security Intelligence Updates when your computer runs on battery power.
Disable Security Intelligence Updates when running on Battery Power:
If you want to turn off backup updates of security intelligence, then create a System Restore Point. Please follow the steps below.
1. Using Local Group Policy Editor :
1. If your Windows has Local Group Policy Editor, then go through the below steps to make changes. Open the Run window by pressing Win+R. Type gpedit.msc and hit the Enter button. This will open the Local Group Policy Editor on your computer.

2. After this, navigate the following path:
Computer Configuration > Administrative Templates > Windows Components > Microsoft Defender Antivirus > Security Intelligence Updates
In the right-hand panel, You can see a setting called “Allow security intelligence updates when running on battery power.”
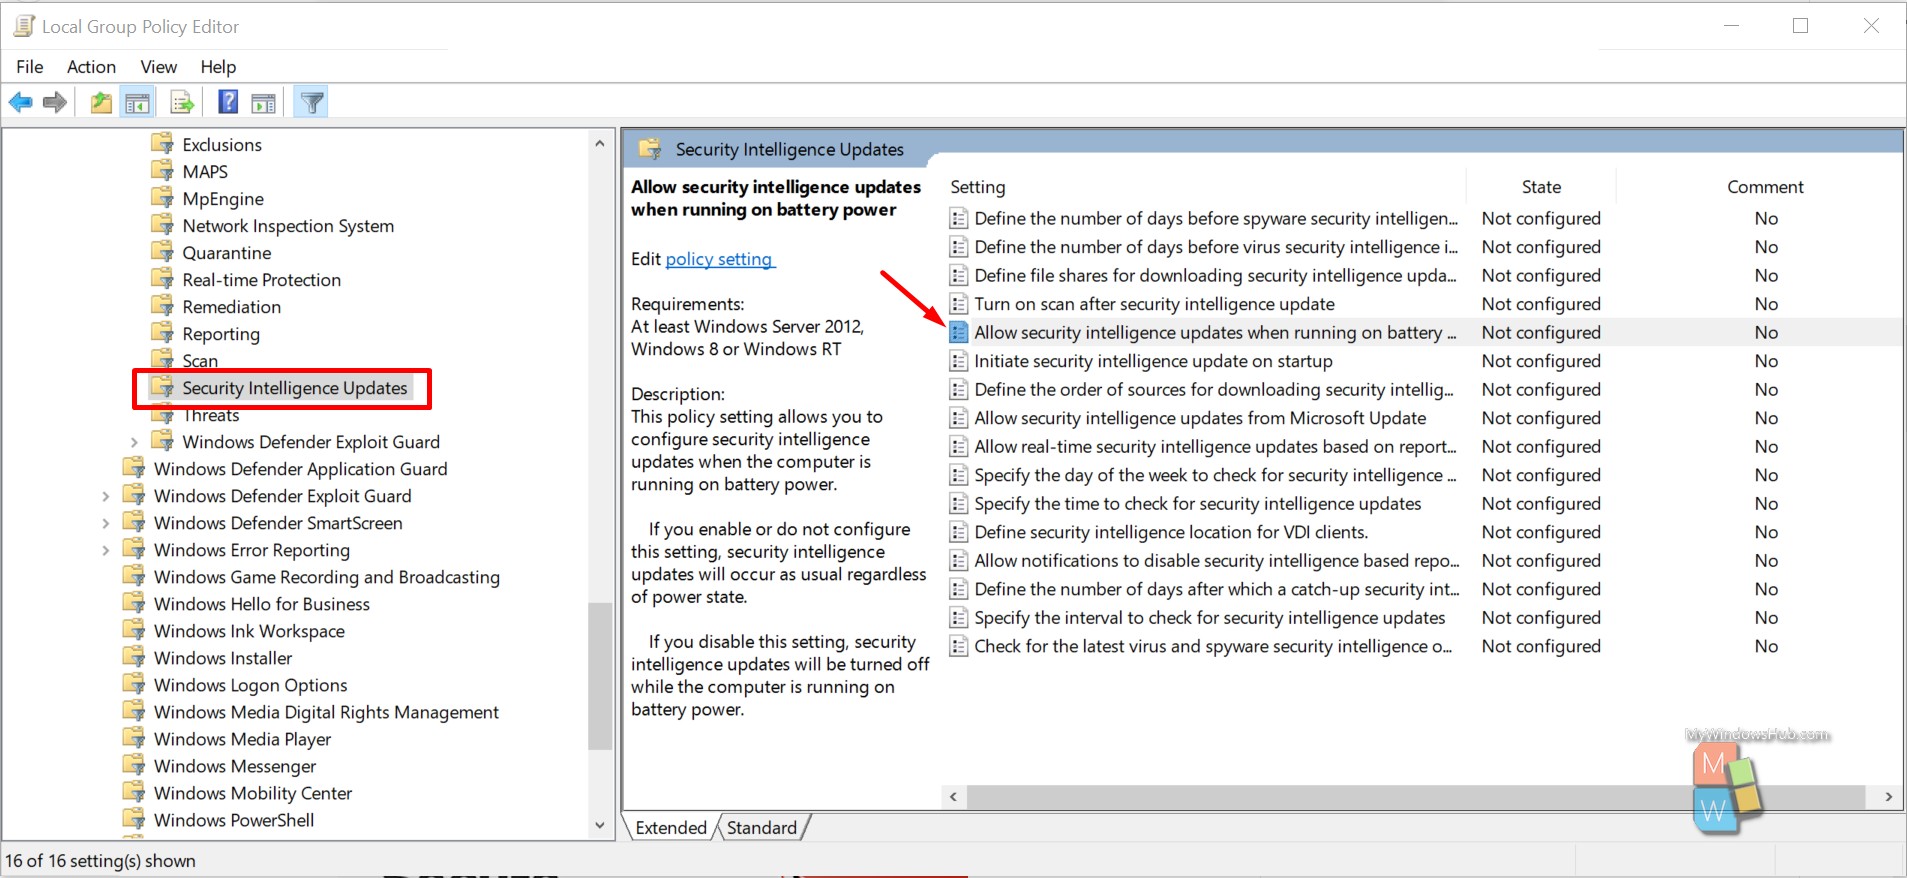
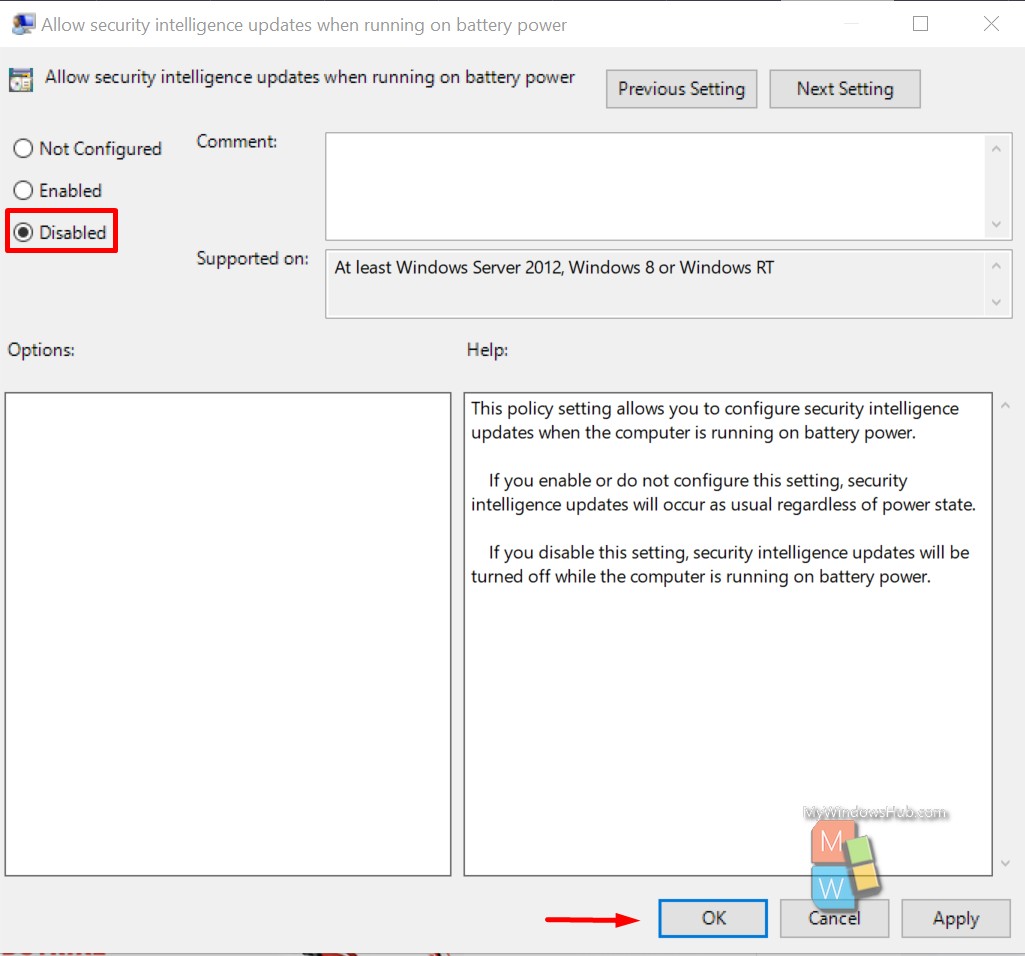
3. By the default, it should be set to Not Configured. To turn off the updates, select the option Disabled, and click the OK button to save the changes. If it is already disabled, you need to select the Enable option and click the OK button to save the changes.
2.Using Registry Editor:
1. Open the Run window by pressing Win+R. Type regedit, and hit the Enter button. If you find UAC prompt, click the Yes button to continue.

2. Then go to the Registry Editor and navigate the path below :
HKEY_LOCAL_MACHINE\Software\Policies\Microsoft\Windows Defender\Signature Updates
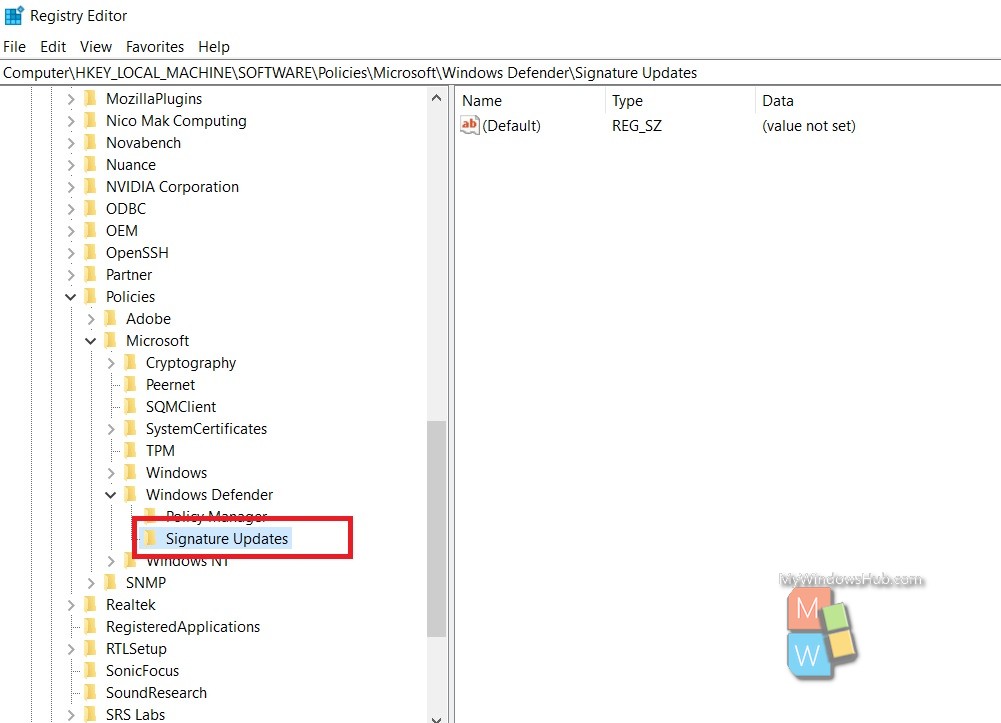
3. In the right panel, you will find a DWORD named:
DisableScheduledSignatureUpdateOnBattery
4. If you cannot find the value, create the value manually. To do so, right-click on the empty area, go to New and select DWORD (32-bit) Value.
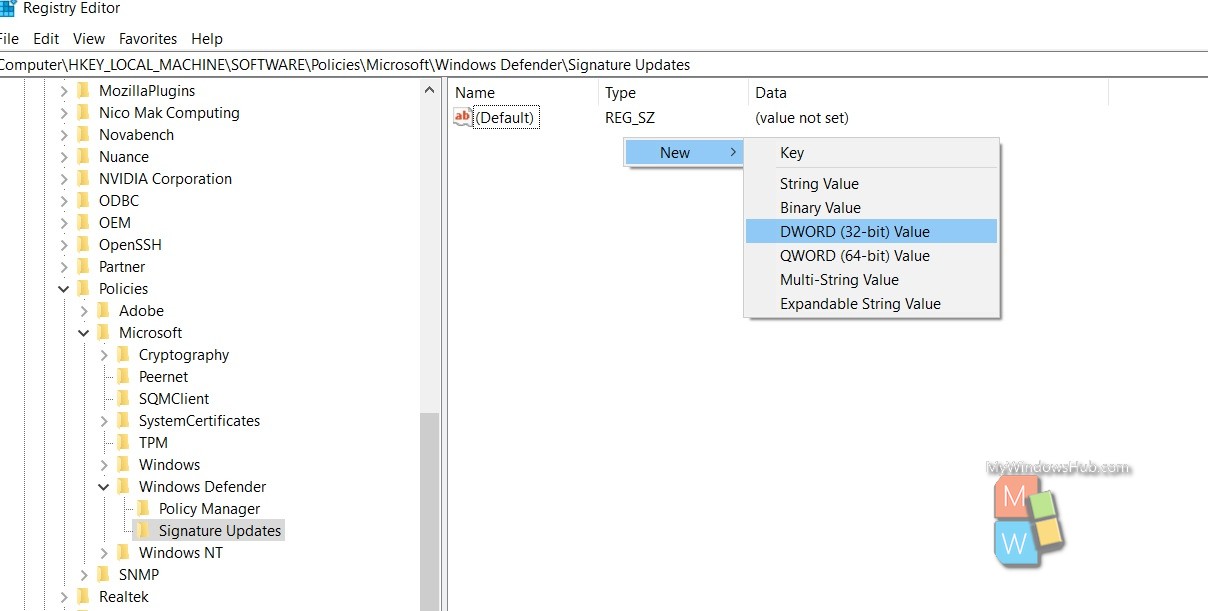
Name it as DisableScheduledSignatureUpdateOnBattery
IU-4
5. After that, name it as mentioned above. By default, the value should be 0, which means the functionality is enabled already. To disable the Security Intelligence Updates, You need to double click on the REG_DWORD value and enter 1, then save the change.
Restart the computer to see the change.