

Macrium Reflect is the free imaging solution for Windows with tons of features like backing up the whole system, restoring the system from windows boot option, and many more within just a few clicks. In this advanced window tutorial, we will walk you through the series of steps to take backup and restore the backed-up images in case of a system failure or data loss due to upgradation.
Part #1 Install Macrium Reflect:
Part one of this tutorial involves downloading and installing the Macrium Reflect Free edition for personal use. Most of the advanced features such as ransomware protection, server-class operating system back up, and many more included in the paid versions.
- Download the Macrium Reflect Free or a 30-day trial of Home edition from this link.
- Click on the Home Use download button and complete the registration process.
- You shall receive an email containing the download link and registration code.
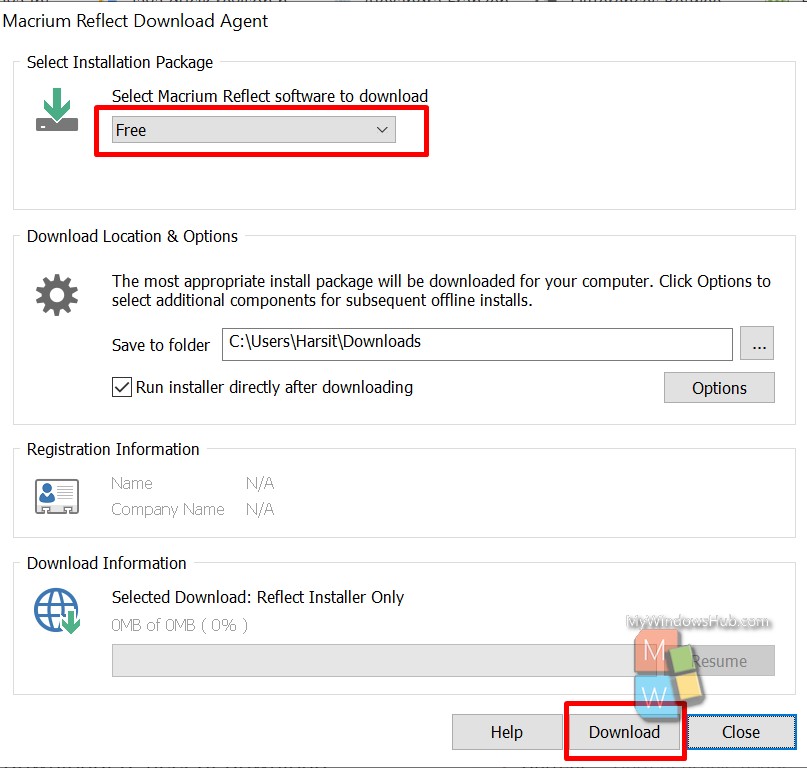
- Open the installer and select “Free” from the first drop-down and click the “Download” button to begin the download of Macrium Reflect Installer.
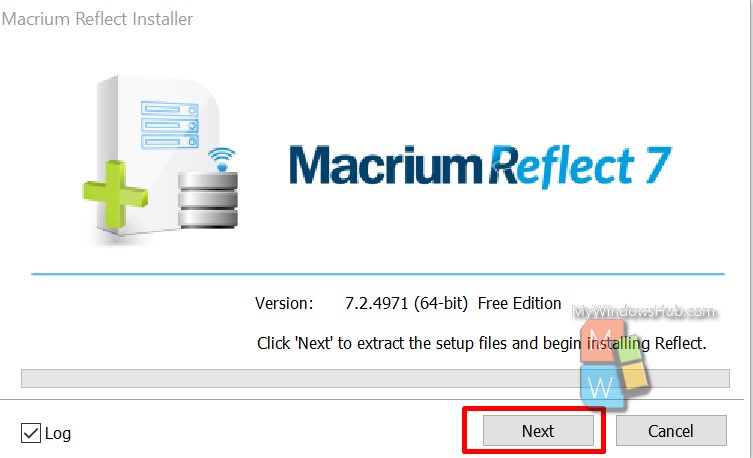
- Once the installer is ready, install the software by accepting all prompts. Please enter the registered email and registration code to complete the installation.
Part #2 Create Rescue Media:
- Run the Macrium Reflect, and if asked for the UAC, then accept the prompt to open the tool.
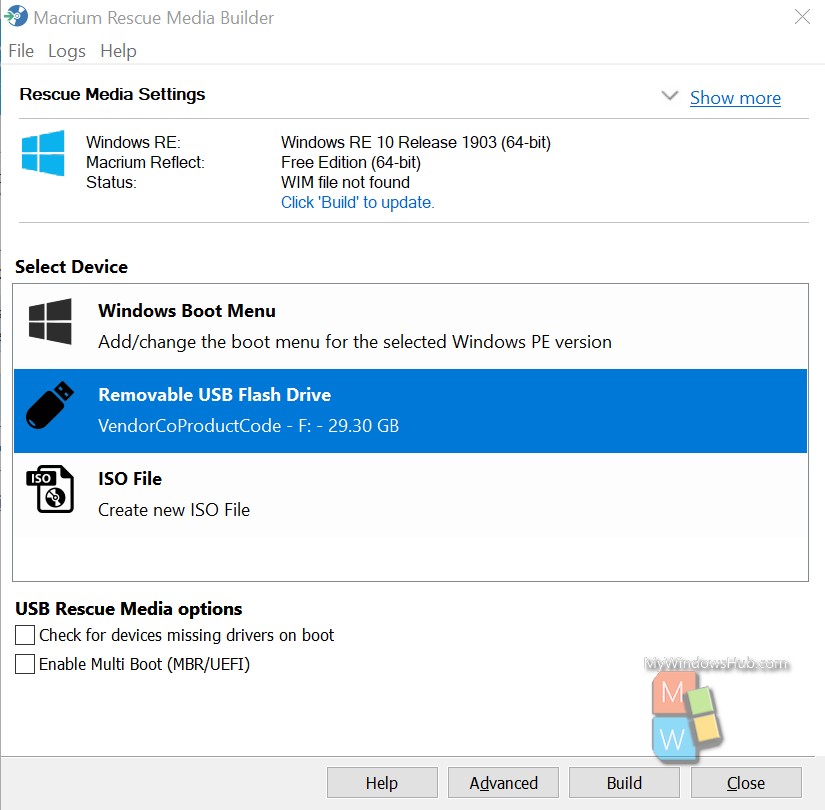
- Hover on the “Other Tasks” menu and click on the “Create Bootable Rescue Media” option to begin the process.
- You can either insert a removal drive or create an ISO file that can be later written to an optical disk drive.
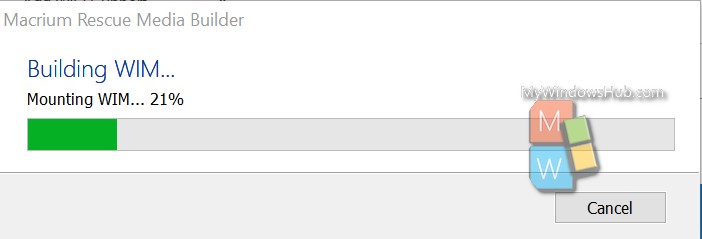
- In our case, we have selected “Removal USB Flash Drive,” then click on the “Build” option to begin the process with default settings.
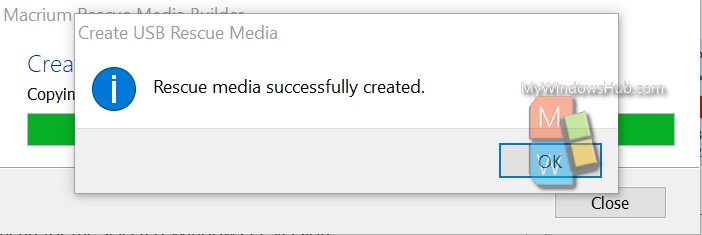
Creating the rescue media now is highly recommended in an external device in case your system fails to boot up normally and the back up images are useless.
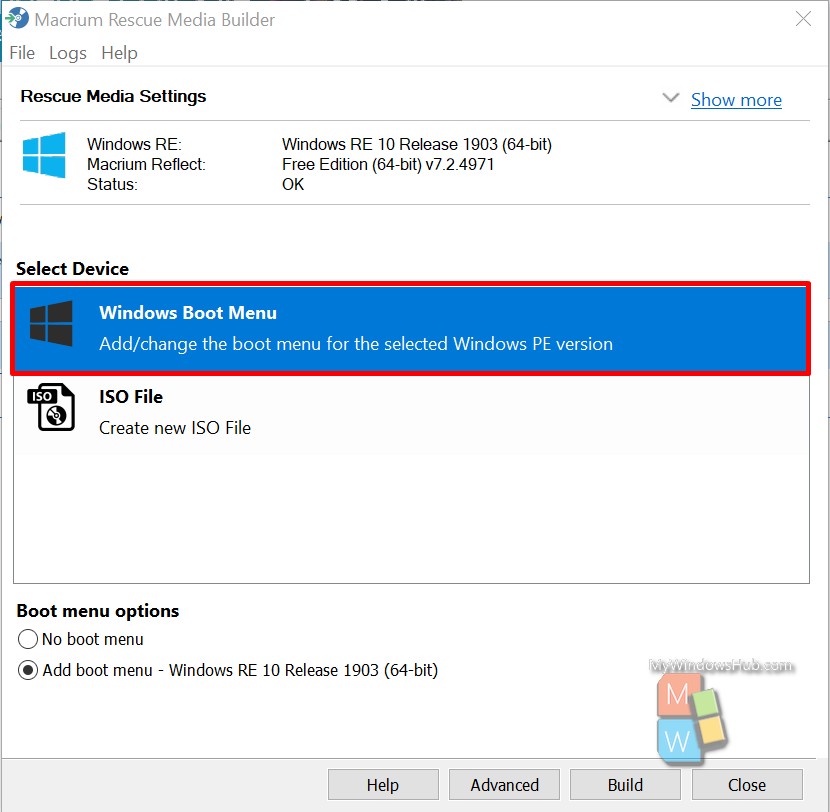
OPTIONAL:
You can also add the Macrium Rescue menu to the Windows Boot Menu. It is a convenient feature and can be helpful when your windows is not booting up normally.
Part #3 Create a full backup image:
In this part, we will walk through the steps to create a full backup image of the whole system, including all your logical disk drives. This process can take a long time based on your logical hard drive selection and the target image file size.
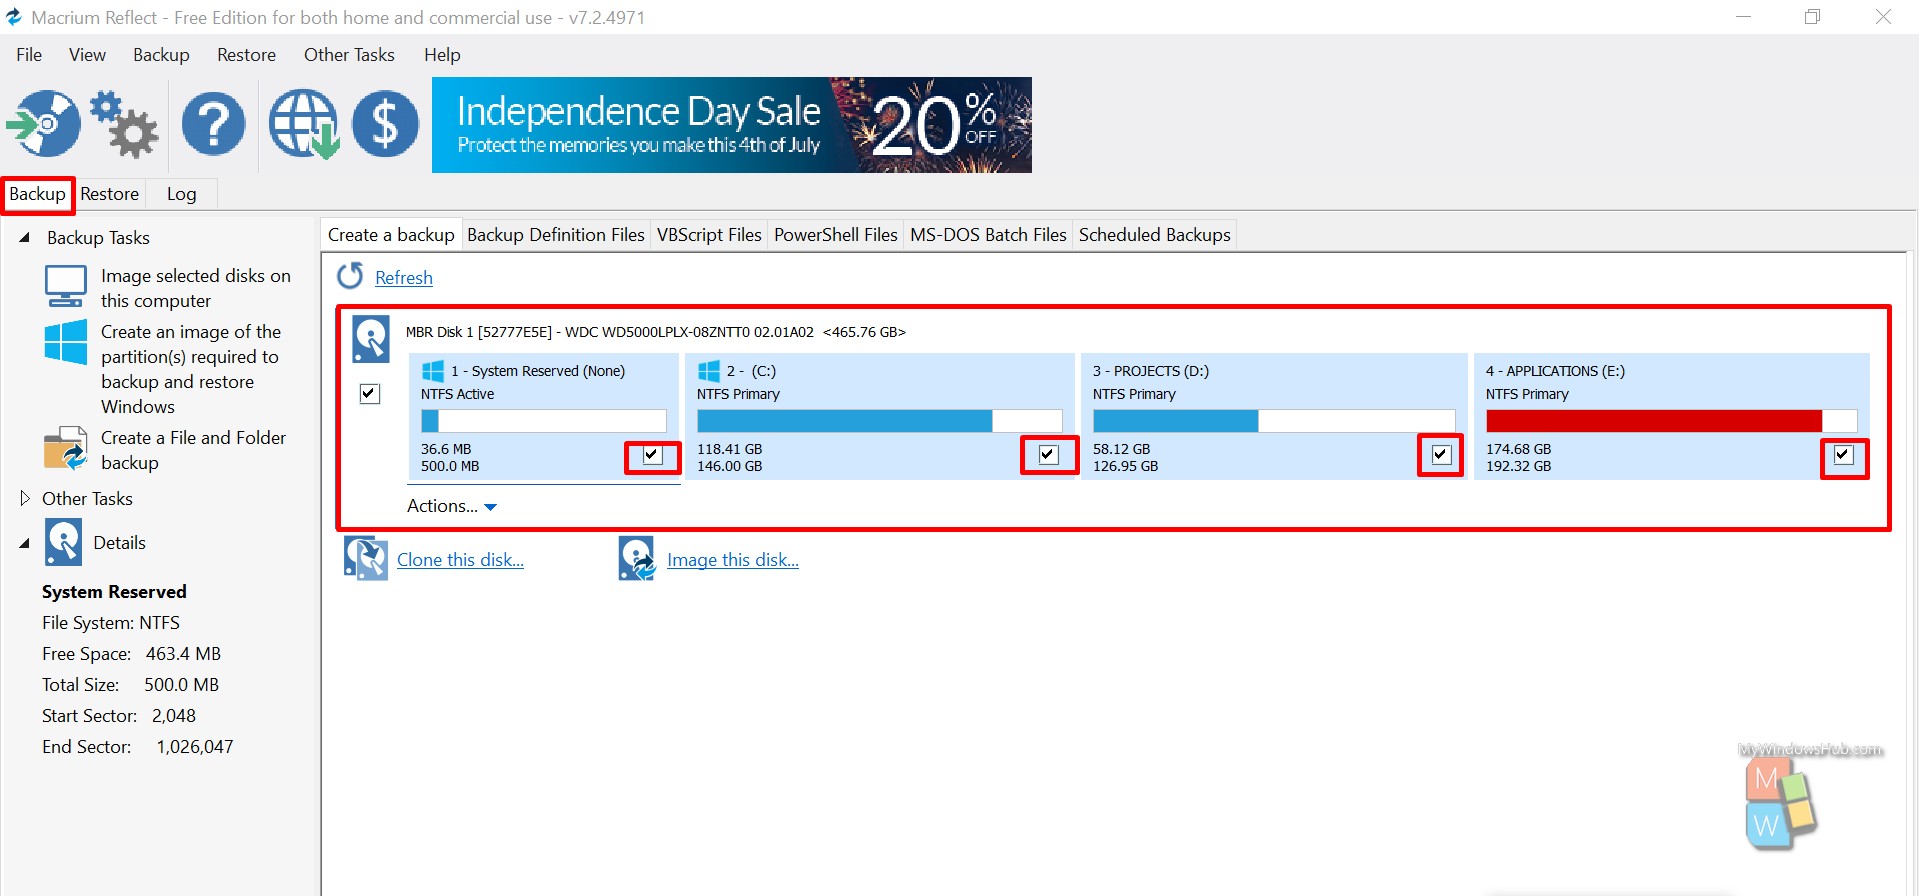
- The welcome screen of Macrium Reflect shows the option to take a full backup of the whole system as mentioned below,
- You can see all the logical disk drives under MBR section
- You can modify the selection by selecting the checkboxes
- After selection of drives from homescreen click on the mentioned backup task “Image selected disks on this computer” to open the dialog where you can,
- Change the preference of logical disks
- Define the destination folder for backup
- Specify the backup file name
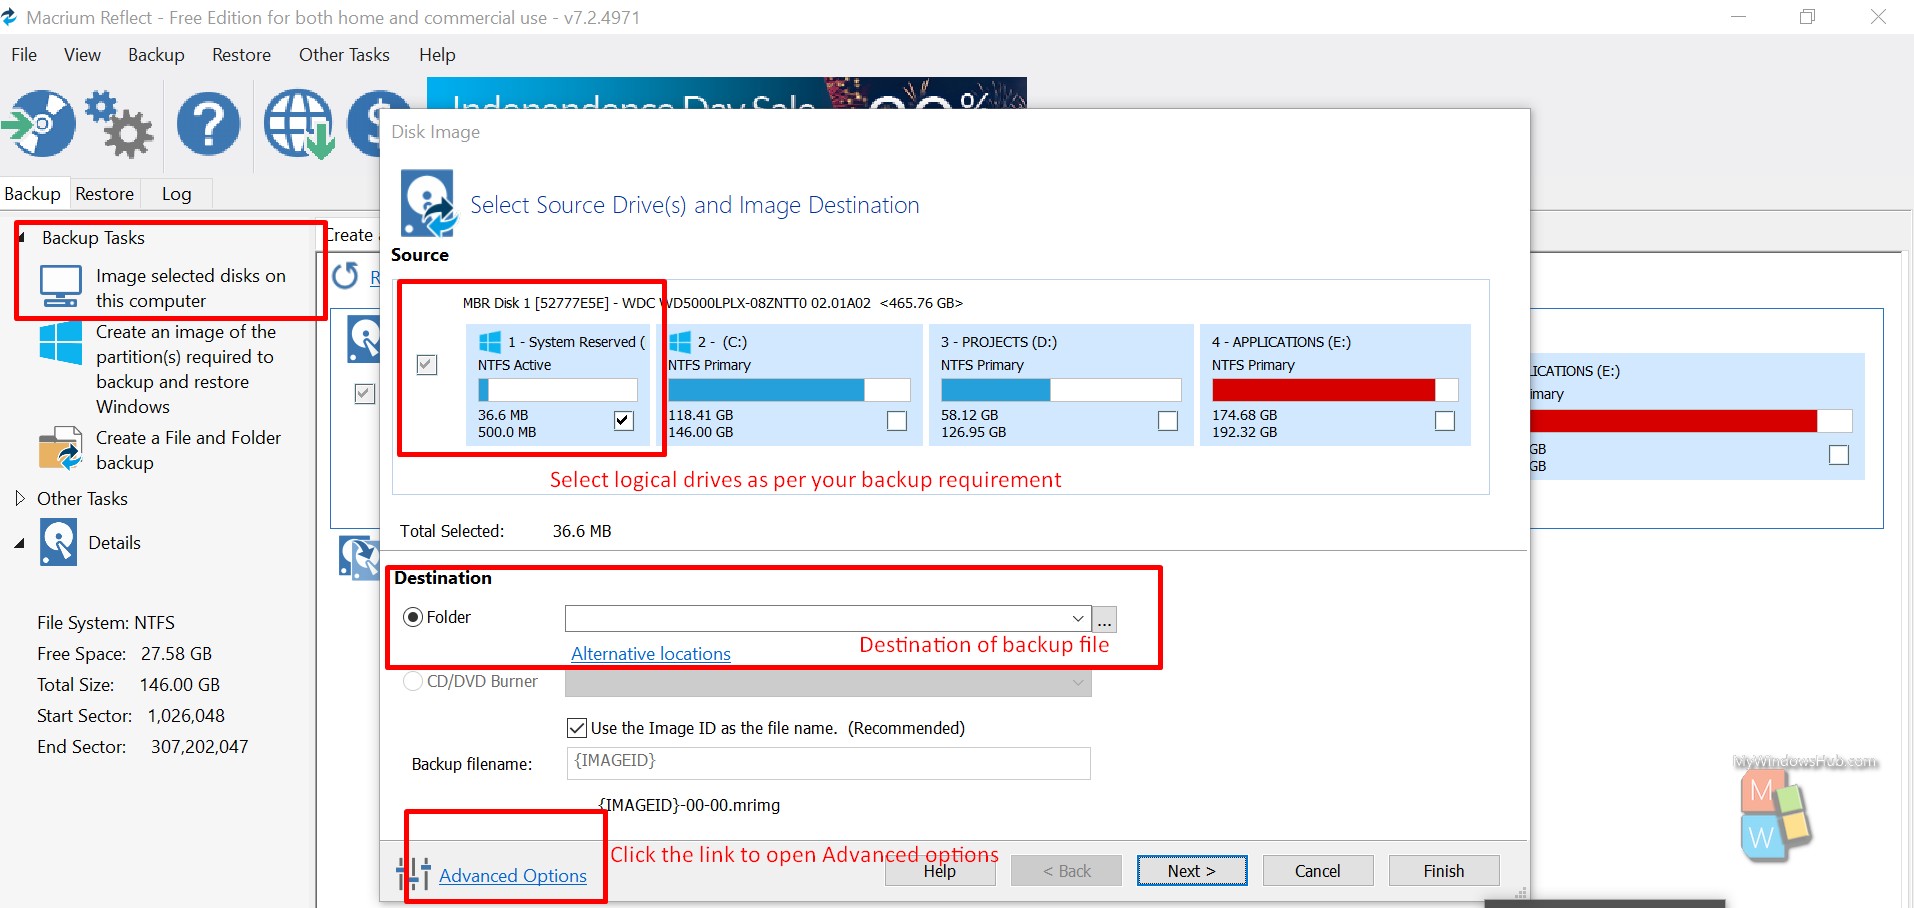
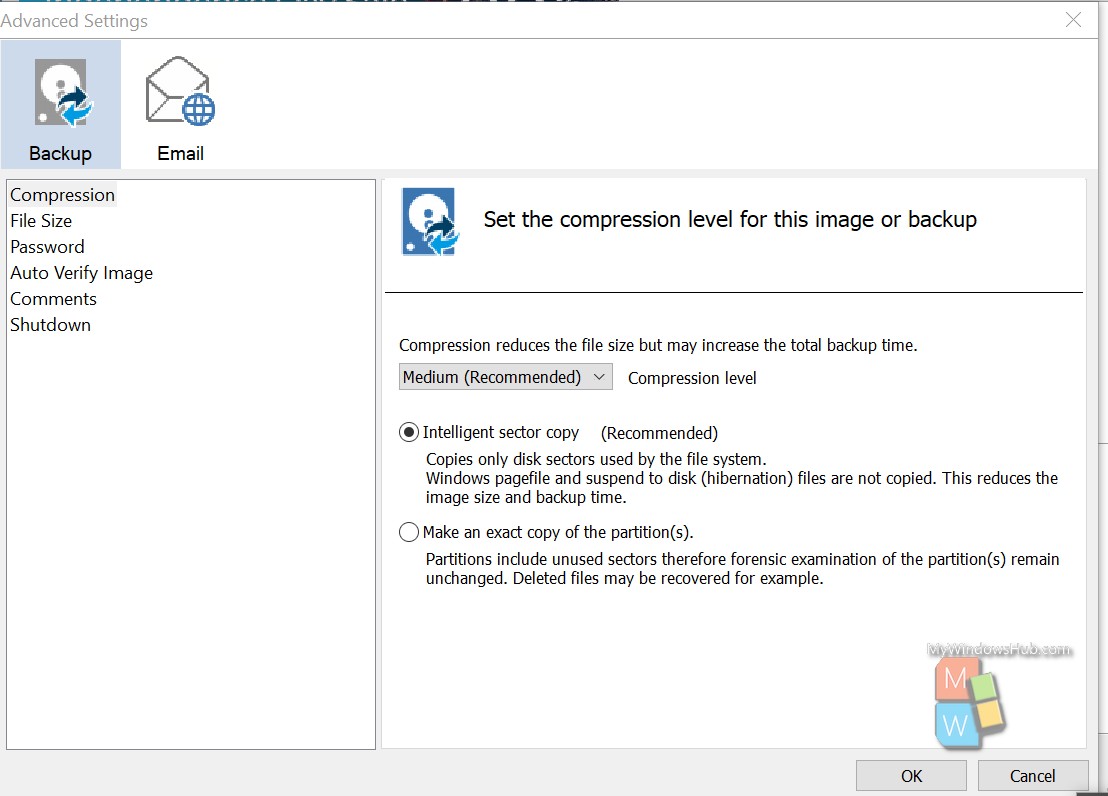
- After making the selection, you can change a few advanced settings that best suited your requirement and recommended. For that click on the “Advanced options” link to open the below dialog,
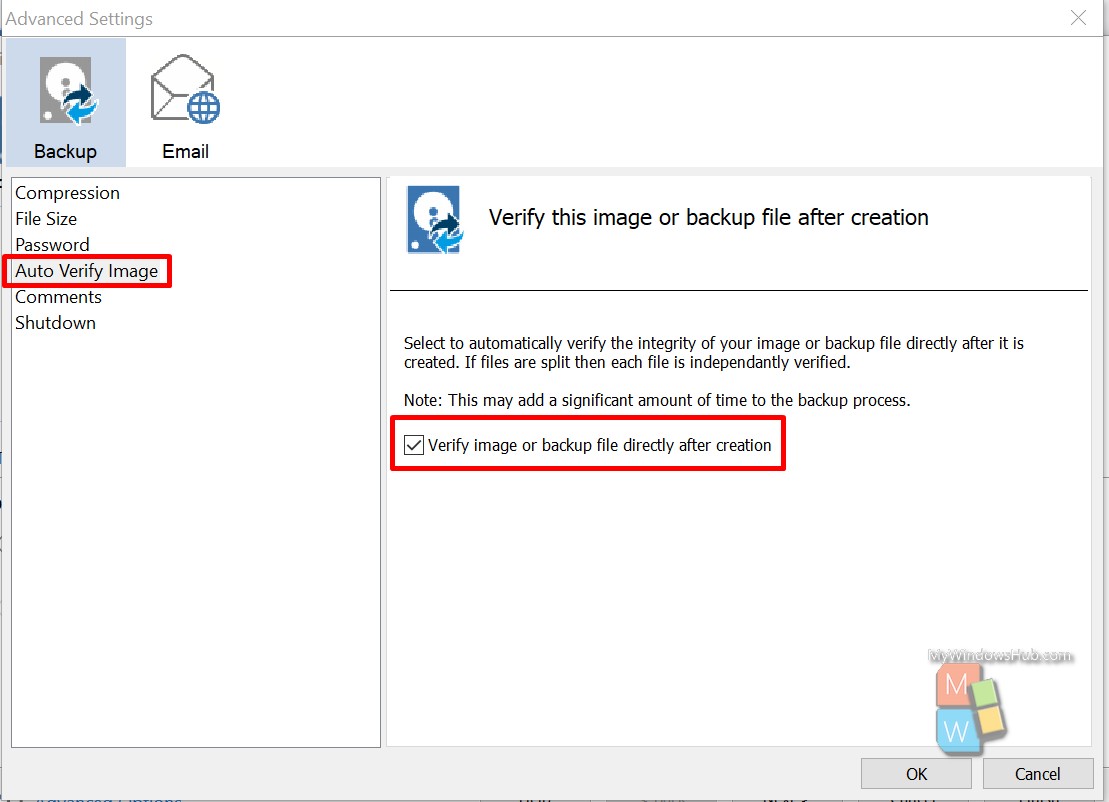
- Macrium allows you to verify the integrity of the backed-up image by selecting the below-mentioned checkbox,
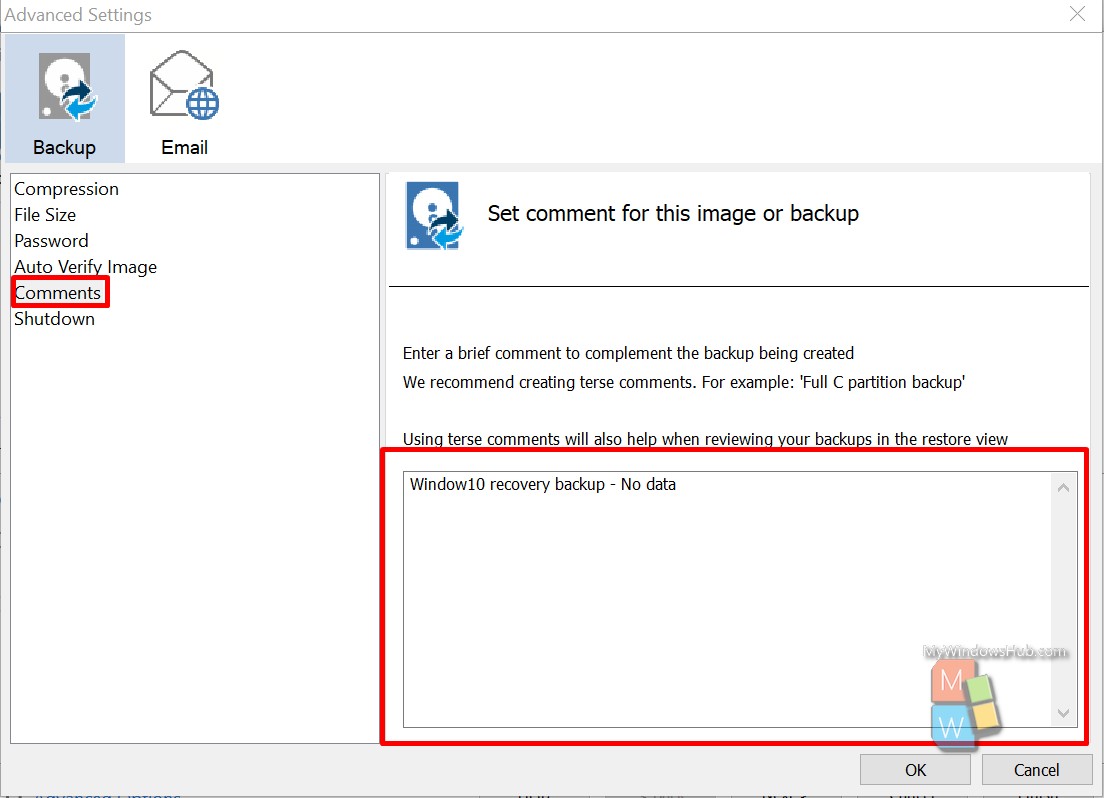
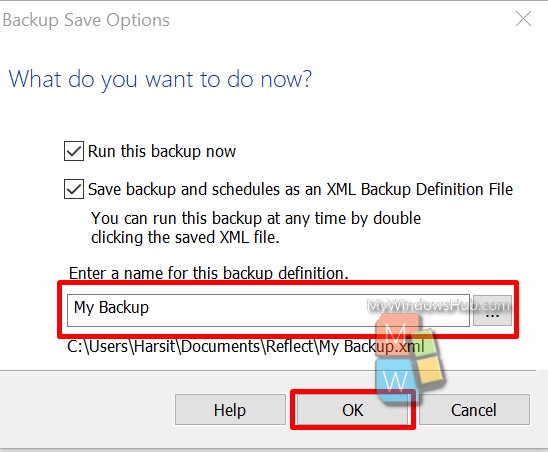
- It is always a good practice to leave behind a comment explaining the backup image and press Ok button as mentioned below,
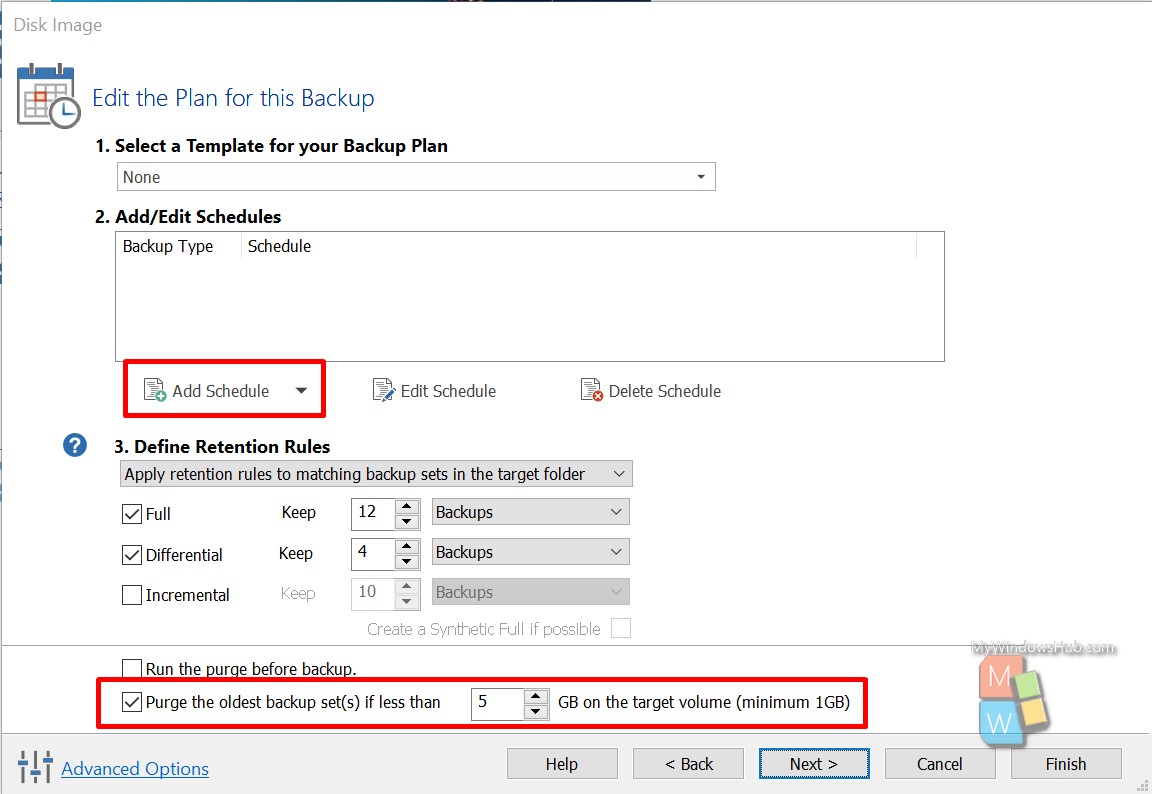
- Upon clicking the Next button, you shall be able to see the below screen to perform the below tasks,
- Schedule your backup
- Choose from pre-defined backup plans
- Options to delete previous backup sets
- Click the Finish button to begin the backup process. You can change the XML backup defination file destination, and click ok to start the actual backup process.

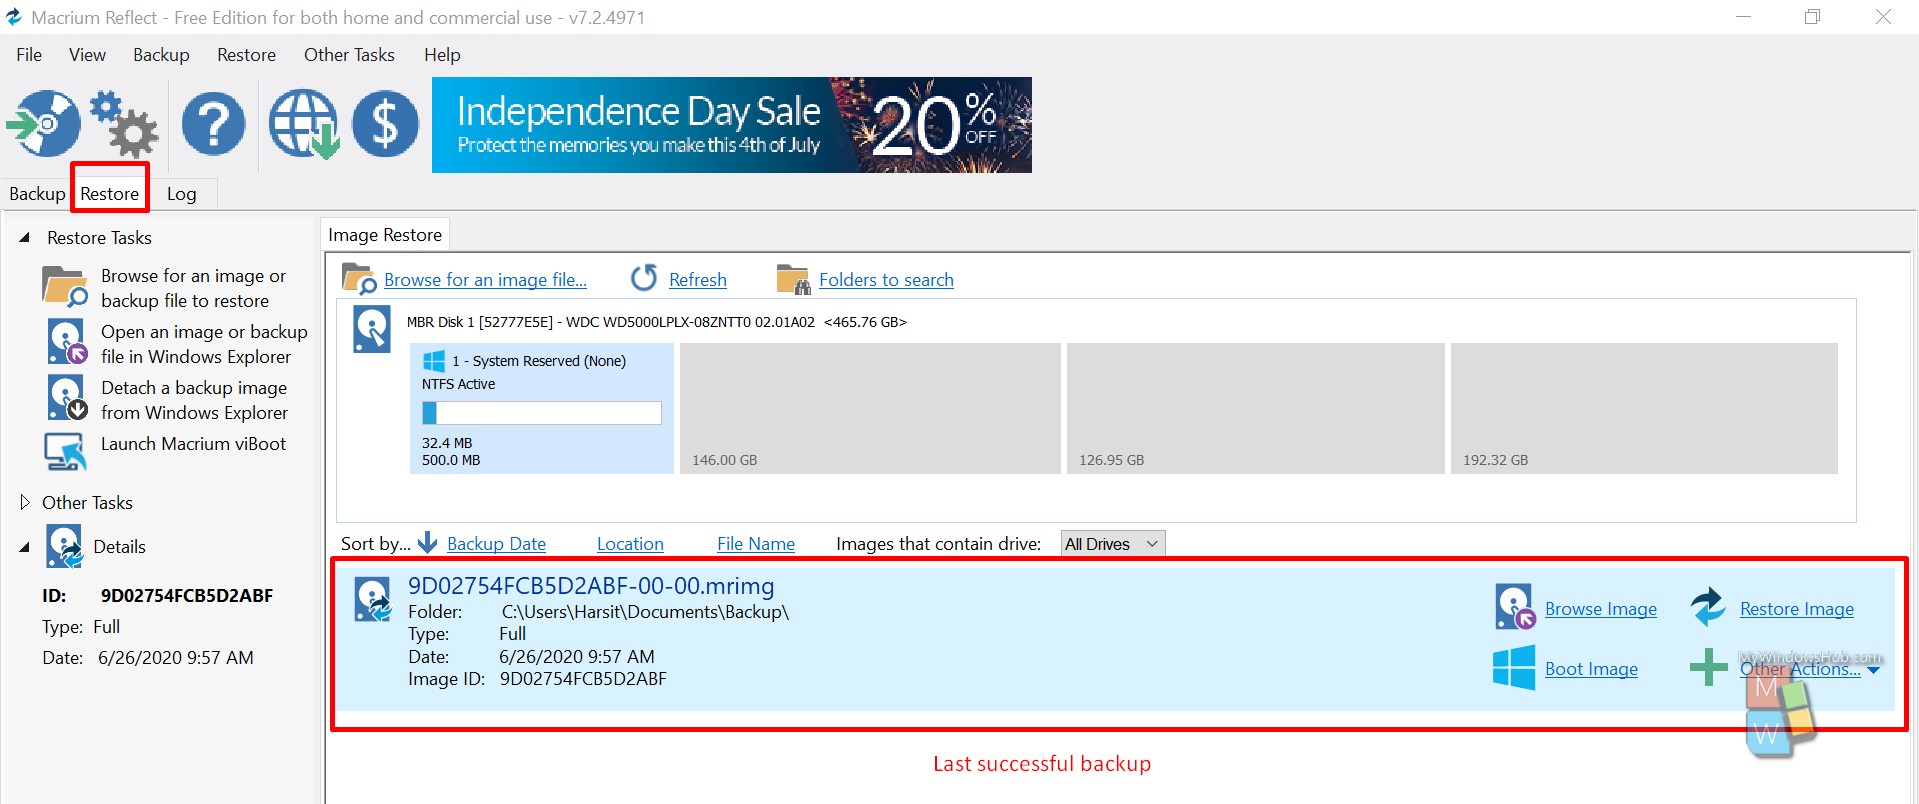
- Click the Restore tab to check the details of last backup image as mentioned below,
Part #4 Restore from the image:
In part, we will walk you through the steps to restore from the backup image that you created earlier.
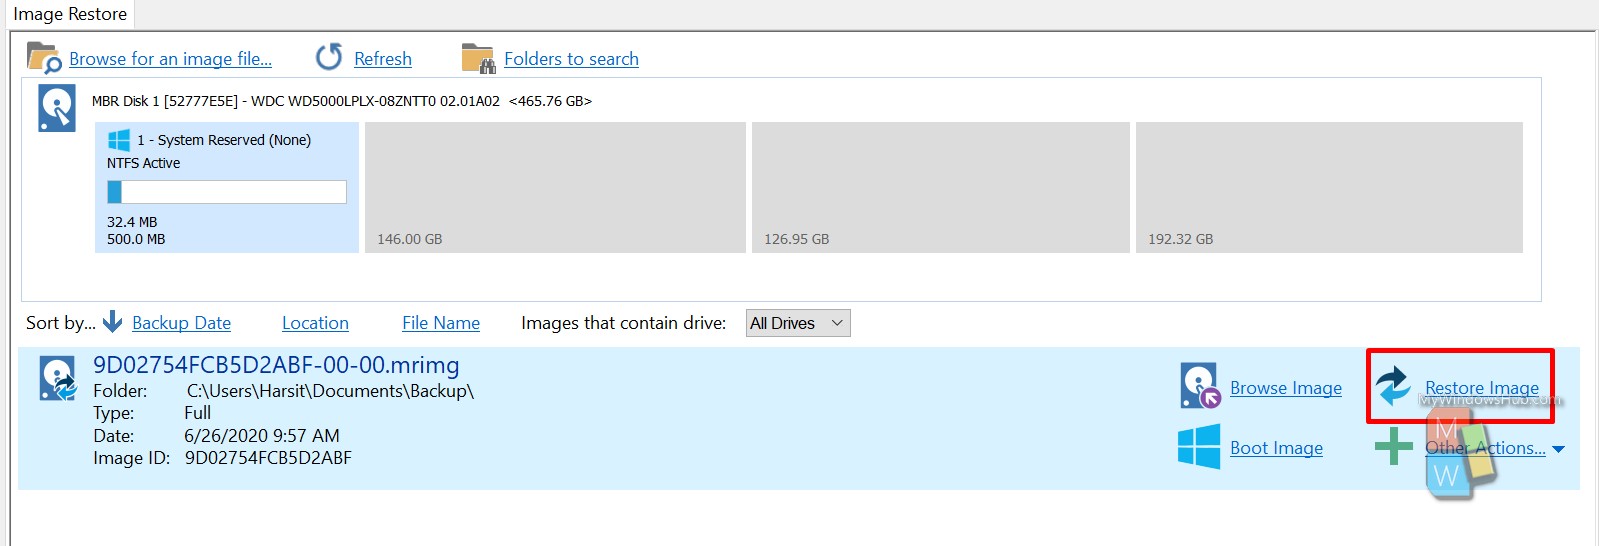
- Click on the “Restore Image” link for the backed up image to begin the restore process as mentioned below,
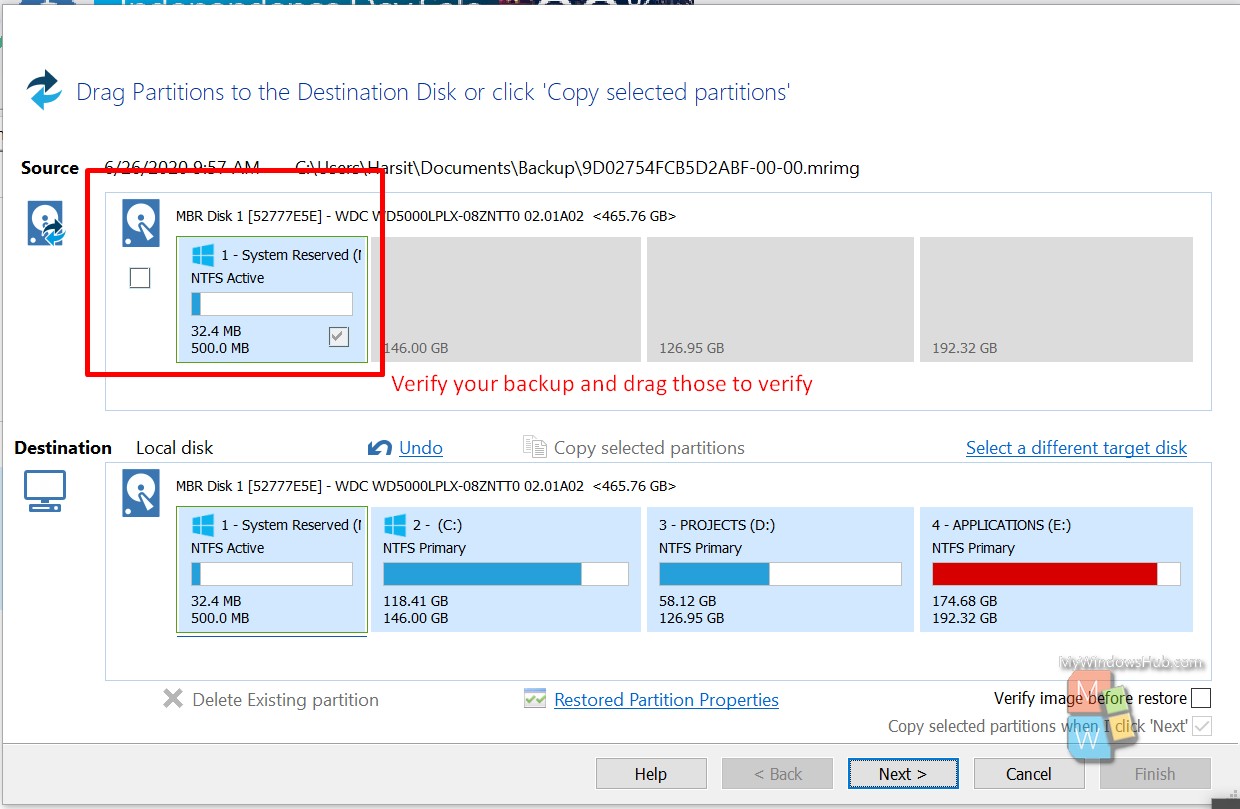
- Click on the Next button and then click on the Finish button to begin the restore process.
Conclusion:
In this article, we have walked you through the steps to install the Macrium Reflect for free, back up the system image, and then restore the image in case of system failure or crash. It is always recommended that you take the system backup in an external device to avoid the loss of backup files in hard drive failure.
About Harsit Mohapatra
Harsit Mohapatra is a full-time Software Engineer passionate and hungry for tech updates and knowledge. Besides being a crazy software developer, he is an avid traveller and loves capturing the things that give him a perception through his lenses