

A Virtual Private Network or VPN connects two remote computers, sites or servers securely using Public network (mainly internet). With the help of the VPN an employee can easily access the Intranet of his organization from anywhere, outside of his office. Organizations having branches in different Geographical locations can easily connect to their centralized intranet using VPN. So, you may need to add VPN in your Windows 8 / Windows 8.1 PC to access Office Intranet or any other reasons. There are two ways to do that. There is a new non-rational modern UI to manage VPN profiles in Windows 8.1. This new interface is present in PC Settings and offers a mixed experience to create, edit, and remove native as well as 3rd party VPN clients.
Steps to Add a Virtual Private Network Connection in Windows 8.1
Add a VPN Connection in PC Settings
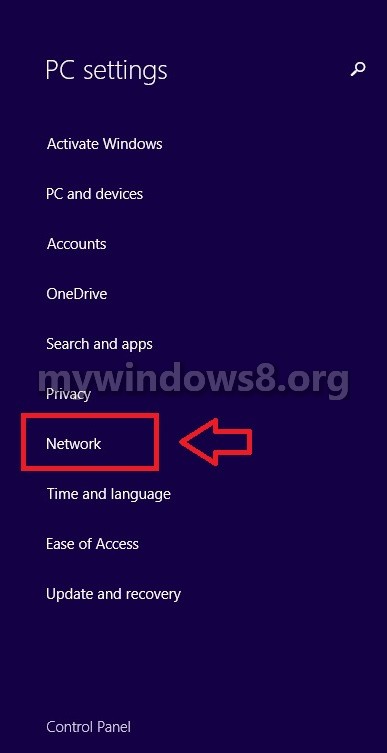
1. Open PC settings, and click on Network on the left side.
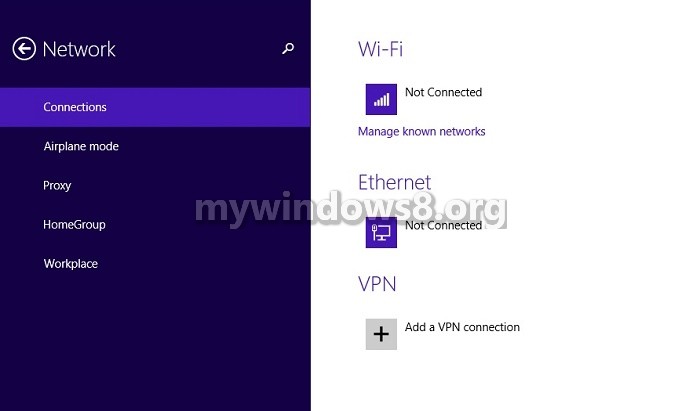
2. Click on Connections on the left side, and click on + Add a VPN connection on the right side.
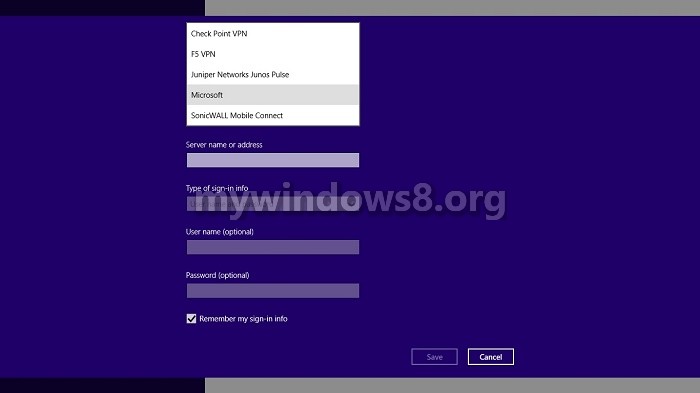
3. Choose the VPN provider used by the service you connect to.
4. Type in a connection name you want for this VPN connection.
5. Type in the IP or domain address of the Remote Access VPN server you are linking to in the Server name or address field.
6. Choose the type of sign-in info you would like to utilize to connect to the VPN.
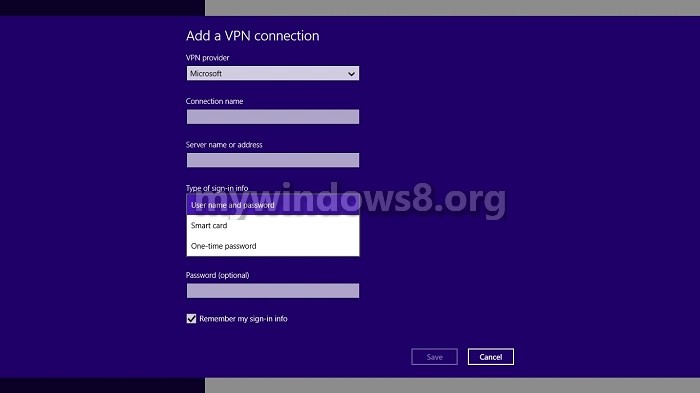
7. Based on the kind of sign-in info you have chosen in step 6, you may have the choice to type in your user name and password for the VPN connection.
8. When you have finished giving the details, click on Save to create and add the VPN connection.
9. Open the Networks UI, click on the freshly added VPN connection, and click on Connect.
10. Give in Username and Password if required and click on OK.
Add a VPN Connection in Network and Sharing Center
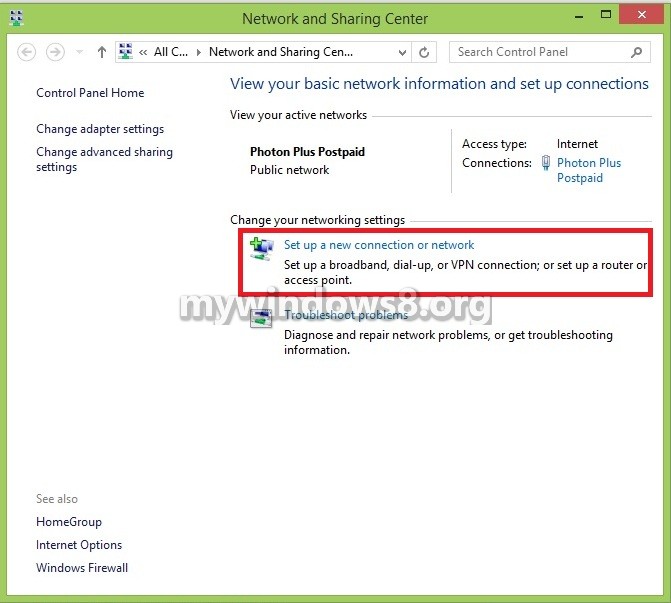
1. Open the Control Panel, and click on the Network and Sharing Center icon.
2. Click on the Set up a new connection option.
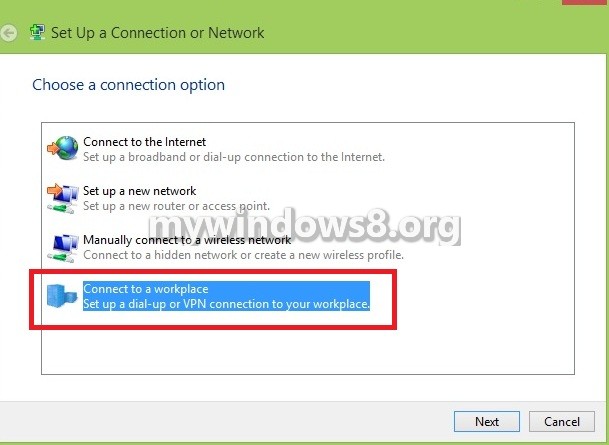
3. Click on Connect to a workplace, and click on Next.
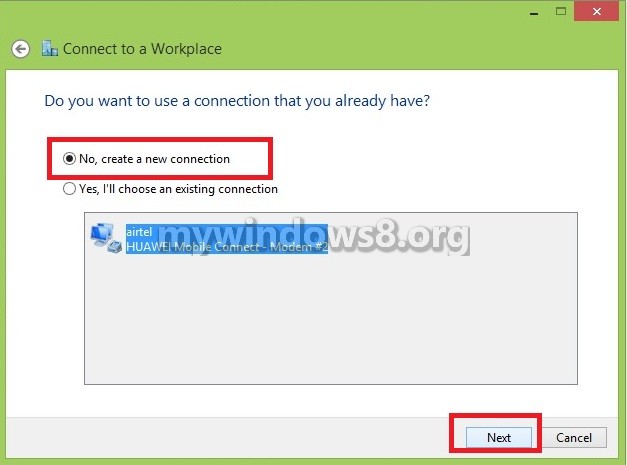
4. If you possess an subsisting connection, then select No, create a new connection, and click on Next.
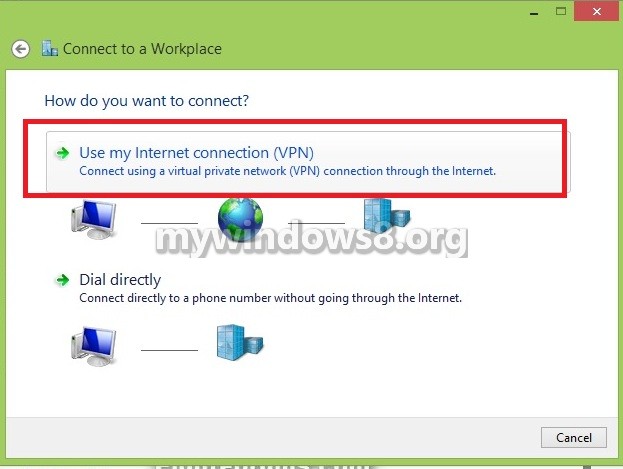
5. Click on Use my Internet connection (VPN).
6. Type in the IP or domain address of the Remote Access VPN server you are linking up to in the Internet address field.

7. Type in a connection name you want for this VPN connection in the Destination name field.
8. If you want to use a user name and password to sign-in to the VPN connection, then un-check the Use a smart card check box.
9. Check or un-check the Allow other people to use this connection check box if you want to. If checked and prompted by UAC, click on Yes or type in an administrator’s password.
10. When completed, click on Create to add the VPN connection.
11. Open the Networks UI, click on the freshly added VPN connection, and click on Connect.
12. Give Username and Password if required and click on OK.
That’s all folks, for more updates keep following us.
About Nick
Nick is a Software Engineer. He has interest in gadgets and technical stuffs. If you are facing any problem with your Windows, feel free to ask him.