

While using internet on any Windows 10 PC, we encounter minor common issues in the internet connectivity. These issues include unavailability of internet connections, inability to access network drives, inability to browse websites etc. Windows have a troubleshooter for network issues but the new Build of Windows 10 includes a built-in Network Reset option.
If a user is facing problems in network connectivity, he/she can run this reset function to solve common issues. The feature, however, may not efficiently solve major technical problems. The function re-installs all your network adapters, set other networking components back to their original settings. Users may also re-install other networking software afterwards such as VPN client software or virtual switches etc.
This feature has been added in Windows 10 Build 1607. The following tutorial provides a step-by-step tutorial of using the network reset feature in Windows 10.
Steps to Use “Network Reset” Feature to Fix Internet Connection Issues in Windows 10
1. Open the Start Menu and go to Settings.
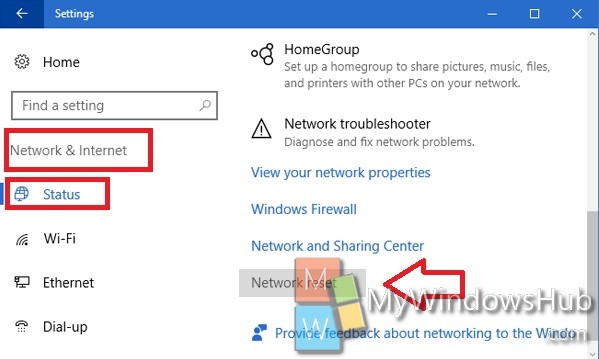
2. Next, click on Network & Internet.
3. Go to the Status tab. In the right pane, you will get an option called Network Reset. Click on it.
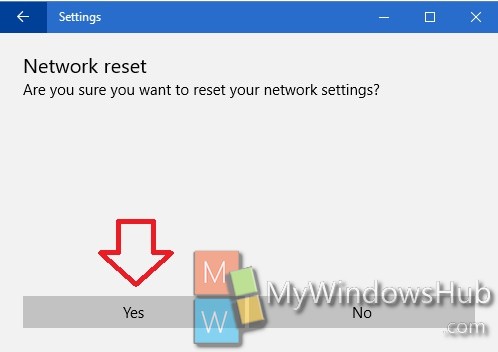
4. The Network Reset tab will open now. This option will provide a brief information about what the Network Reset feature will do to your computer. Click on Reset Now.

5. It will prompt you to confirm whether you want to Reset Network settings. Click Yes to continue.
About Nick
Nick is a Software Engineer. He has interest in gadgets and technical stuffs. If you are facing any problem with your Windows, feel free to ask him.